
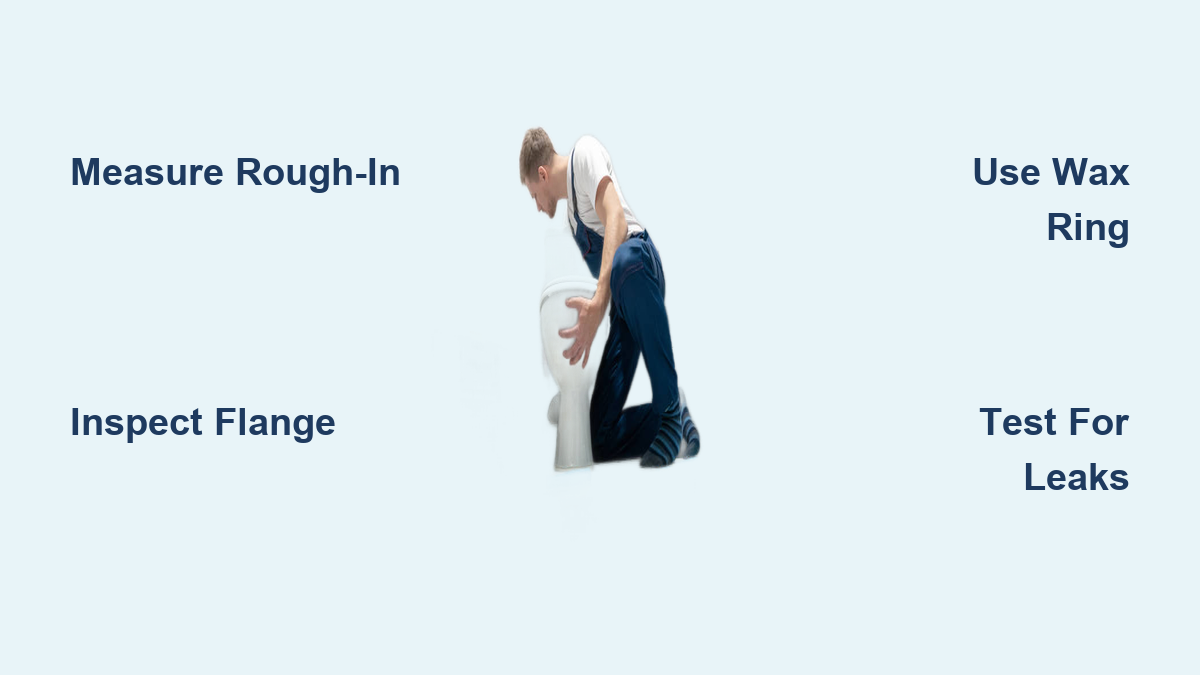
Learning how to install a toilet can save you hundreds of dollars in plumber fees and give you a valuable home improvement skill. Whether you’re replacing a worn-out unit or adding a toilet to a new bathroom, a proper installation prevents leaks, odors, and costly water damage. Surprisingly, about 90% of toilets are installed incorrectly, usually because of small details like flange height or wax ring quality that homeowners overlook.
This guide walks you through every step of how to install a toilet, from measuring your space and removing the old unit to setting the new bowl, securing the tank, and testing for leaks. You’ll pick up professional techniques that ensure a durable, watertight installation that holds up for years to come.
Measure Your Bathroom Space Correctly

Before buying a new toilet, accurate measurements prevent costly fitting errors and ensure your new unit works with your existing plumbing.
Check the Rough-In Distance
The rough-in measurement is the distance from the back wall to the center of the drainpipe. Most toilets use a 12-inch rough-in, though older homes may have a 10-inch rough-in. Measure from the baseboard to the center of the closet bolts using a tape measure. Installing a 12-inch toilet on a 10-inch rough-in prevents the toilet from sealing properly against the wall.
Choose the Right Bowl Shape and Height
• Round bowls save space and fit tight bathroom layouts.
• Elongated bowls offer extra comfort but need more floor room.
• Chair-height toilets (17 to 19 inches) reduce strain on knees and help aging adults.
Make sure you have at least 15 inches of side clearance from the centerline to any wall or fixture.
Pick a High-Efficiency Model
Modern toilets use 1.28 gallons per flush or less. Look for WaterSense-labeled models that meet strict performance and efficiency standards. Compact, high-efficiency options are widely available at major home improvement retailers.
Gather the Right Tools and Materials
Having everything on hand before starting makes the installation process smooth and efficient.
Must-Have Tools
• Adjustable wrench and crescent wrench for supply lines and nuts
• Sponge and bucket or shop vac to remove water from the tank and bowl
• Utility knife for cutting caulk and scoring old sealant
• Hacksaw for trimming closet bolts to length
• Needle-nose pliers for stopping spinning flange bolts
• Flathead screwdriver for holding tank nuts while loosening
• Level for aligning the tank and bowl
• Gloves to protect your hands from sharp porcelain edges and messy wax
Key Replacement Parts
• New wax ring, preferably extra-thick or with a plastic diverter
• New closet bolts and flange washers (never reuse old hardware)
• Flange extender if new flooring has raised the floor level
• New braided stainless steel water supply line
• Clear silicone caulk for sealing the base
• Sanded grout for stabilizing toilets on uneven floors
Pro Tip: Warm the wax ring under tap water for 10 to 15 seconds before installation. This softens the wax and helps it form a better seal when compressed.
Remove the Old Toilet Safely
Proper removal protects your floors, prevents sewer gas exposure, and sets the stage for a clean installation.
Shut Off Water and Drain the System
Turn off the water supply valve located behind the toilet. Flush to empty the tank, then use a shop vac or sponge to remove remaining water from both the tank and bowl. Pouring a bucket of water quickly into the tank creates a vacuum that clears hidden water, reducing spills when you lift the bowl.
Disconnect the Supply Line
Place a rag under the connection to catch drips. Use an adjustable wrench to disconnect the supply line from the tank’s fill valve. Replace the line if it shows any signs of corrosion.
Remove the Tank on Two-Piece Models
Locate the tank-to-bowl bolts underneath the tank. Hold each nut steady with a flathead screwdriver while loosening the bolt from above. Lift the tank straight up using your legs, not your back, and set it aside in another room.
Lift the Bowl Carefully
Score around the base with a utility knife to break the old caulk seal. Remove the plastic caps and nuts from the closet bolts. If a bolt spins when you turn the nut, grip the bolt head with needle-nose pliers or slightly lift the bowl to break the wax seal. Lift the bowl straight up (it weighs about 50 pounds) and place it on a trash bag for disposal.
Critical Step: Immediately cover the open flange with a rag or old wax ring. This blocks sewer gases and prevents debris from falling into the drain.
Inspect and Repair the Toilet Flange
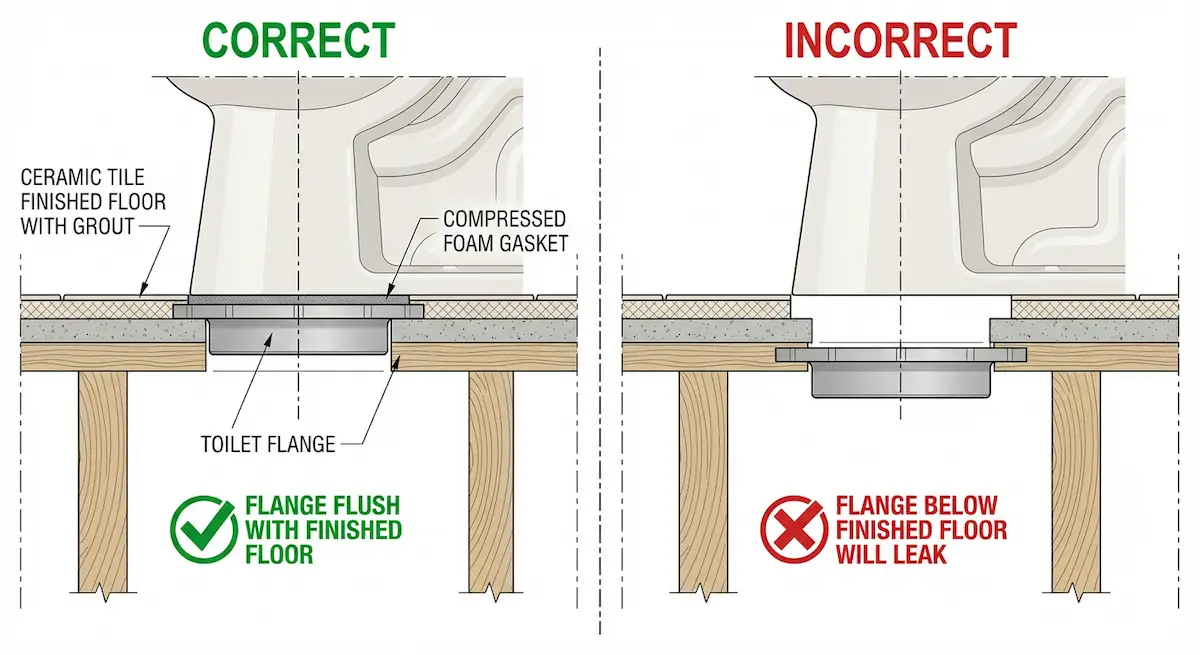
The flange is the most common failure point in toilet installations, so careful inspection here saves you from future headaches.
Check Flange Height
The top of the flange must sit flush with the finished floor or up to 1/4 inch above it. If the flange sits below the floor (common after new tile or vinyl installation), a standard wax ring will not seal properly. A low flange causes uneven wax compression, leading to leaks and unpleasant odors over time.
Repair or Replace the Flange
Scrape off all old wax residue using a plastic putty knife to avoid damaging the flange. If the flange is cracked or corroded, use a repair kit or replace it entirely. For flanges that sit too low due to new flooring, install a flange extender or raised flange kit. If you have a damaged PVC flange, an ODI Twist and Seal 3-inch flange works well. Insert it into the drain, press down, and twist until tight. The internal rubber gasket seals through compression.
Secure the Flange to the Subfloor
Pre-drill holes and screw the flange securely into the subfloor. An unsecured flange rocks with each flush, eventually breaking the wax seal. Inspect the subfloor for soft spots, rot, or non-waterproof laminate. Repair any damage before proceeding.
Set the New Toilet Bowl in Place
This is the heart of how to install a toilet, where precision and careful handling make all the difference.
Install the Closet Bolts
Insert new closet bolts into the flange slots. Use specialized flange washers with a plastic pull-tab to hold the bolts perfectly vertical. This prevents the bolts from tipping over when you place the heavy toilet. Twist the bolts slightly to lock them in place.
Position the Wax Ring
Place the wax ring either on the flange or on the toilet horn, depending on the manufacturer’s instructions. Never touch the wax surface with bare fingers; wear gloves and remove any plastic packaging first.
Lower the Bowl Carefully
With a helper if possible, lift the bowl and align the holes with the closet bolts. Lower it straight down without rocking or shifting. Once seated, gently rock the bowl side to side to compress the wax evenly. Press down firmly so the toilet sits flush with the floor.
Secure the Bowl
Slide washers and nuts onto the bolts. Tighten alternately, a little on one side, then the other, to avoid cracking the porcelain. Stop when snug. Overtightening is the leading cause of cracked toilet bases. Trim excess bolt length with a hacksaw and snap on the decorative covers.
Attach the Tank for Two-Piece Models
If your toilet has a separate tank, proper installation ensures a watertight connection between the tank and bowl.
Prepare the Tank
Lay the tank upside down on a towel to protect the surface. Insert the tank-to-bowl bolts through the holes in the tank base. Slide the large rubber spud washer over the bolts at the base.
Mount and Level the Tank
Set the tank onto the bowl, aligning the bolts with the corresponding holes. Hand-tighten the nuts underneath, then use a wrench to tighten them alternately. Place a level on top of the tank and adjust until it sits straight. Do not overtighten, as this cracks the tank.
Connect Water Supply and Test for Leaks
Thorough testing confirms your installation is solid before you put the toilet into regular use.
Install the Supply Line
Connect a new braided stainless steel supply line to the wall valve and the tank fill valve. If the valve is old or corroded, replace it. Hold the valve body steady while tightening the compression nut to prevent pipe stress. The copper ring inside compresses as you tighten, creating a stronger seal.
Turn On Water and Inspect
Slowly open the shutoff valve and let the tank fill gradually. Check carefully for leaks at three key spots:
• Supply line connections at both ends
• Tank-to-bowl joint underneath the tank
• Base of the toilet where it meets the floor
Flush the toilet 3 to 4 times and watch for water at the base. If water appears, the wax ring failed and you need to lift the toilet and start over with a fresh ring.
Listen for Unusual Sounds
Gurgling during flushing may indicate venting issues. Make sure the toilet does not rock. If it does, the floor is uneven or the seal is not firm enough.
Finish with Caulking and Final Adjustments

The finishing touches improve both appearance and long-term durability.
Caulk the Base
Despite some debate, caulking is recommended. Apply a bead of clear silicone around the base after confirming no leaks exist. This prevents moisture and cleaning fluids from seeping under the toilet, improves cleanliness, and adds stability. Leave a small gap at the back so any future leaks can be detected.
Stabilize Uneven Floors
If the toilet rocks after installation, mix a small batch of sanded grout. Pack it under the low side of the base and let it set for a few hours. Once cured, polish the grout and apply a bead of clear silicone over it for a seamless finish. This transfers the toilet’s weight directly to the tile rather than relying solely on the wax seal.
Install the Toilet Seat
Attach the toilet seat using a screwdriver, aligning it straight and tightening securely. Some modern models feature tool-free hinges for easier installation.
Common Mistakes to Avoid When Installing a Toilet
Knowing these pitfalls helps you avoid the errors that plague most DIY installations.
Flange Height Errors
Installing on a flange that sits below the finished floor is the leading cause of installation failure. Always use a flange extender if the flange is too low.
Wrong Wax Ring Selection
Avoid economy wax rings that lack plastic diverters. These compress unevenly and fail faster. Choose premium rings with built-in funnels for reliable sealing.
Unsecured Flange
A loose flange moves with each flush, eventually breaking the wax seal. Always screw the flange securely to the subfloor.
Overtightening Bolts
Porcelain cracks easily under excessive force. Snug is enough; do not force it.
Ignoring Subfloor Conditions
Moisture under laminate or rotted wood leads to mold and structural damage. Repair the floor before installing the new toilet.
Frequently Asked Questions About Installing a Toilet
What tools do I need to install a toilet?
You will need an adjustable wrench, crescent wrench, utility knife, hacksaw, needle-nose pliers, flathead screwdriver, level, gloves, and either a shop vac or sponge and bucket. A drill with bits is also helpful for securing the flange to the subfloor.
How long does it take to install a toilet?
Most DIY installations take 2 to 4 hours, depending on your experience level and whether the flange needs repairs. Removing the old toilet typically takes 30 to 60 minutes, while setting and securing the new toilet takes another hour or so.
Do I need to replace the wax ring every time?
Yes, always install a new wax ring when reinstalling a toilet. Wax rings compress during installation and cannot form a reliable seal a second time. Reusing an old ring almost always leads to leaks.
What is the rough-in measurement for a toilet?
The rough-in is the distance from the back wall to the center of the closet bolts at the floor. Standard measurements are 10 inches or 12 inches, with 12 inches being most common. Measure carefully before buying a toilet to ensure proper fit.
Can I install a toilet on uneven flooring?
Yes, but you need to stabilize it. Use sanded grout packed under the low side of the base to transfer weight to the tile. After the grout cures, apply silicone caulk over it for a finished appearance and added stability.
Why is my new toilet leaking at the base?
Water at the base usually means the wax ring failed to seal properly. This happens when the flange sits too low, the wax ring is of poor quality, or the toilet was not pressed down firmly during installation. You will need to lift the toilet, replace the wax ring, and reseat the bowl.
Key Takeaways for a Successful Toilet Installation
Knowing how to install a toilet correctly comes down to a few critical details. First, measure your rough-in distance accurately and choose a bowl shape that fits your space. Second, inspect and repair the flange before installing the new toilet, since flange problems cause the majority of installation failures. Third, use quality materials including a premium wax ring with a plastic diverter and new closet bolts.
Throughout the process, tighten bolts alternately and only until snug to avoid cracking the porcelain. Test thoroughly for leaks at every connection point before caulking the base. Finally, stabilize any uneven flooring with sanded grout for long-term durability.
Your next step is to gather your tools and materials, then set aside a weekend afternoon for the project. With careful preparation and attention to detail, you can complete a professional-quality toilet installation that serves your household reliably for many years.