
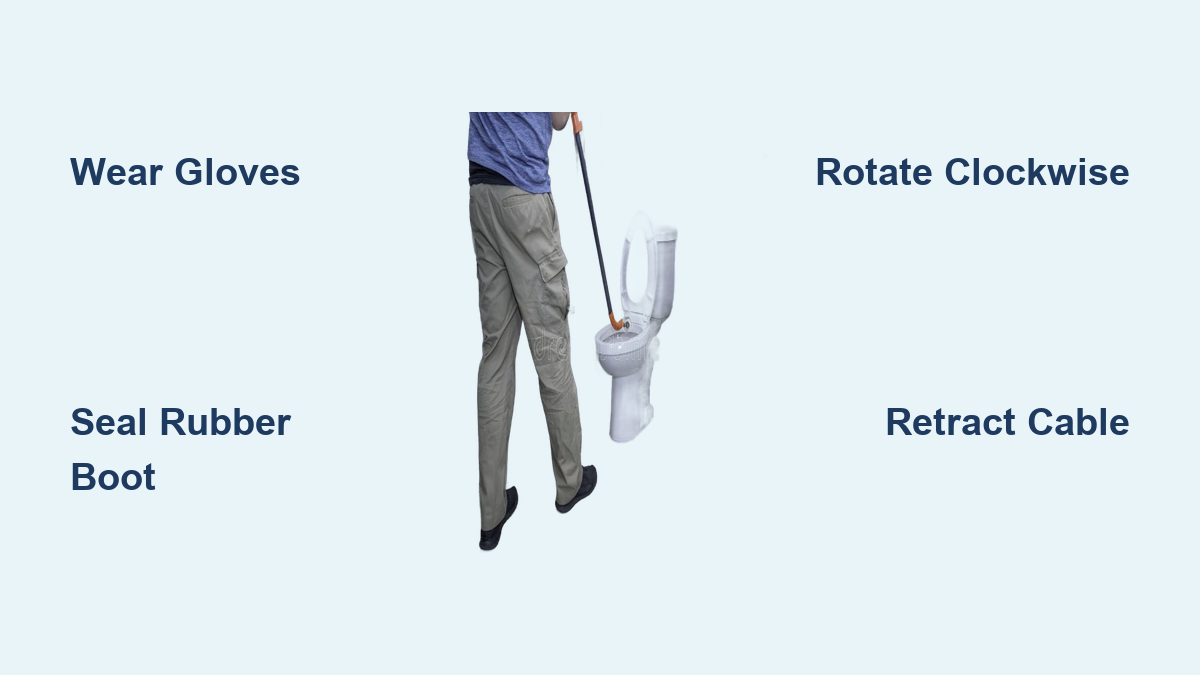
Few household problems feel more urgent than a toilet that refuses to drain. When plunging fails and the water keeps rising, learning how to use a toilet auger becomes your fastest path to relief. This specialized tool, sometimes called a closet auger, reaches past the toilet’s curved trap to break up or retrieve stubborn blockages that a plunger simply cannot move.
A toilet auger features a flexible steel cable wrapped inside a curved housing with a protective rubber boot. With proper technique, most clogs clear in under 15 minutes without calling a plumber. This guide covers every step from setup and insertion to cleaning and storage, so you can handle toilet blockages safely and confidently.
Prepare for Safe Operation
Gather Protective Gear and Supplies
Raw sewage carries harmful bacteria, so protection comes first. Put on heavy-duty rubber gloves and consider safety goggles if splashing seems likely. Keep old towels, a bucket, and disinfecting wipes within arm’s reach.
If the bowl is near overflowing, bail out excess water using a small cup. This simple step prevents messy spills once you begin augering.
Inspect the Auger Before Use
A quick check saves headaches later. Pull the handle to fully retract the cable into the shaft, keeping the metal tip enclosed. Examine the rubber boot at the base: it should be intact, flexible, and firmly attached.
Confirm you have enough overhead clearance for the handle to rotate freely. A cracked boot or cramped workspace can turn a simple repair into a costly mistake.
Insert the Auger Correctly
:max_bytes(150000):strip_icc()/how-to-use-a-toilet-auger-2719038-Hero-9fed37f3e59042cab0f9d7b7cc372ac0.jpg)
Position and Align the Tool
Stand beside the toilet for maximum control. Grip the auger with one hand on the crank handle and the other stabilizing the shaft. Insert the rubber-tipped end into the drain opening at the bottom of the bowl.
Press the rubber guard firmly against the porcelain to create a seal. Angle the tool slightly backward to match the trapway’s natural curve. Let gravity and gentle pressure guide the tip in rather than forcing it.
Feed the Cable with Rotation
Begin turning the crank clockwise while pushing the handle forward. This rotation lets the flexible cable glide through bends without kinking. Keep the rubber boot sealed against the bowl throughout.
If you hit early resistance, stop pushing. Retract slightly, adjust your angle, and resume steady clockwise turns. Most toilet traps sit about 10 to 12 inches deep, so the clog or pipe wall appears within that range.
Clear the Blockage Effectively
Break Up Soft Clogs
When resistance stops your progress, you have likely reached the clog. For soft blockages like compacted toilet paper or waste, keep rotating clockwise with moderate forward pressure.
Work the cable back and forth in small motions. Advance an inch, retract slightly, and continue rotating. Perform 5 to 10 full rotations at the resistance point to ensure the path opens fully. You will know it is working when the cable moves more freely or the water level begins dropping.
Retrieve Solid Objects
For solid obstructions such as toys, wipes, or hygiene products, the goal shifts from breaking to grabbing. Keep rotating clockwise until the spring tip hooks onto the item.
Once engaged, slowly turn the handle counter-clockwise while pulling the auger backward. This reverse motion locks the object onto the cable. Pull steadily and dispose of the debris immediately, then disinfect the area.
Retract and Clean the Tool

Withdraw the Cable Safely
After clearing the clog, retract the cable by turning the handle counter-clockwise. Keep the rubber guard pressed against the bowl to catch any dripping residue. Lift the auger out only after the entire cable sits inside the housing.
Yanking the tool out while extended risks splattering waste or damaging the bowl rim. Patience here protects both your bathroom and your cleanup time.
Clean and Disinfect Thoroughly
Move the auger to a utility sink, shower, or outdoor area. Rinse the cable with hot water, then wash it with soapy water and disinfectant to kill bacteria. Wipe down the housing and guard with a clean rag.
Dry every part completely to prevent rust. Apply a light coat of machine oil or silicone spray to maintain flexibility. Retract the cable fully before putting the tool away.
Test the Toilet’s Drainage
Perform a Flush Test
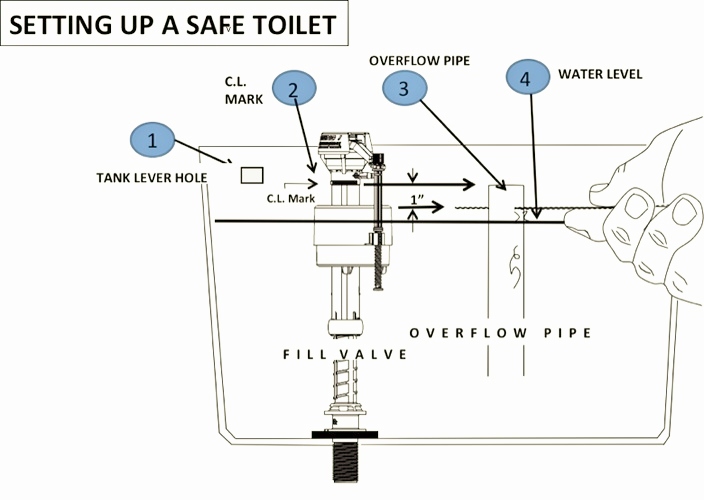
Verification confirms the repair worked. First, check the water level: it should sit about one inch below the overflow tube. Drop a small piece of toilet paper into the bowl; if it stays on the surface, drainage is functioning.
Flush the toilet once. A successful unclogging produces strong swirling, complete drainage, and a full refill. If water rises dangerously or drains slowly, repeat the augering process. Most stubborn clogs clear within two attempts.
Recognize When to Call a Pro
After two full augering cycles with no improvement, deeper issues may exist. Watch for these warning signs:
- Water backing up in showers or sinks
- Gurgling sounds from other drains
- Persistent slow drainage despite repeated efforts
These symptoms point to a main sewer line blockage beyond a household auger’s reach. A licensed plumber with a motorized snake or camera inspection can diagnose and resolve the problem.
Avoid Common Mistakes
Don’t Force the Auger
Excessive pressure cracks porcelain or damages the trap. Let the rotating cable do the work. If the tool stops advancing, retract slightly, adjust the angle, and try again with gentle clockwise turns.
Always Use the Rubber Guard
The rubber boot protects the toilet’s finish. Never let the metal shaft touch the porcelain surface. Skipping this precaution causes permanent scratches or chips.
Never Feed Counter-Clockwise
Turning the handle counter-clockwise while pushing forward causes the cable to unspool and kink inside the pipe. Always advance with clockwise rotation only.
Use the Right Tool for the Job
Standard sink snakes and urinal augers lack the length and design for toilets. Only use a toilet-specific auger with a protective boot and 3 to 6 feet of cable.
Store for Long-Term Use
Choose a Dry Storage Location
Keep the auger in a cool, dry place such as a basement shelf or garage cabinet. Hang it if possible, or store it upright so the cable avoids being crushed under heavy tools.
Avoid damp bathrooms where moisture accumulates on metal parts. Proper storage extends the tool’s lifespan significantly.
Inspect Before Each Use
Before the next plumbing emergency, check these key components:
- Rubber boot: Replace if cracked or loose
- Cable: Look for rust, kinks, or fraying
- Handle mechanism: Ensure smooth rotation and secure locking
A well-maintained auger can last decades. Investing in a quality model between $50 and $60 pays for itself after avoiding a single plumber visit.
Know When to Upgrade or Call Help
Consider a Drill-Ready Auger
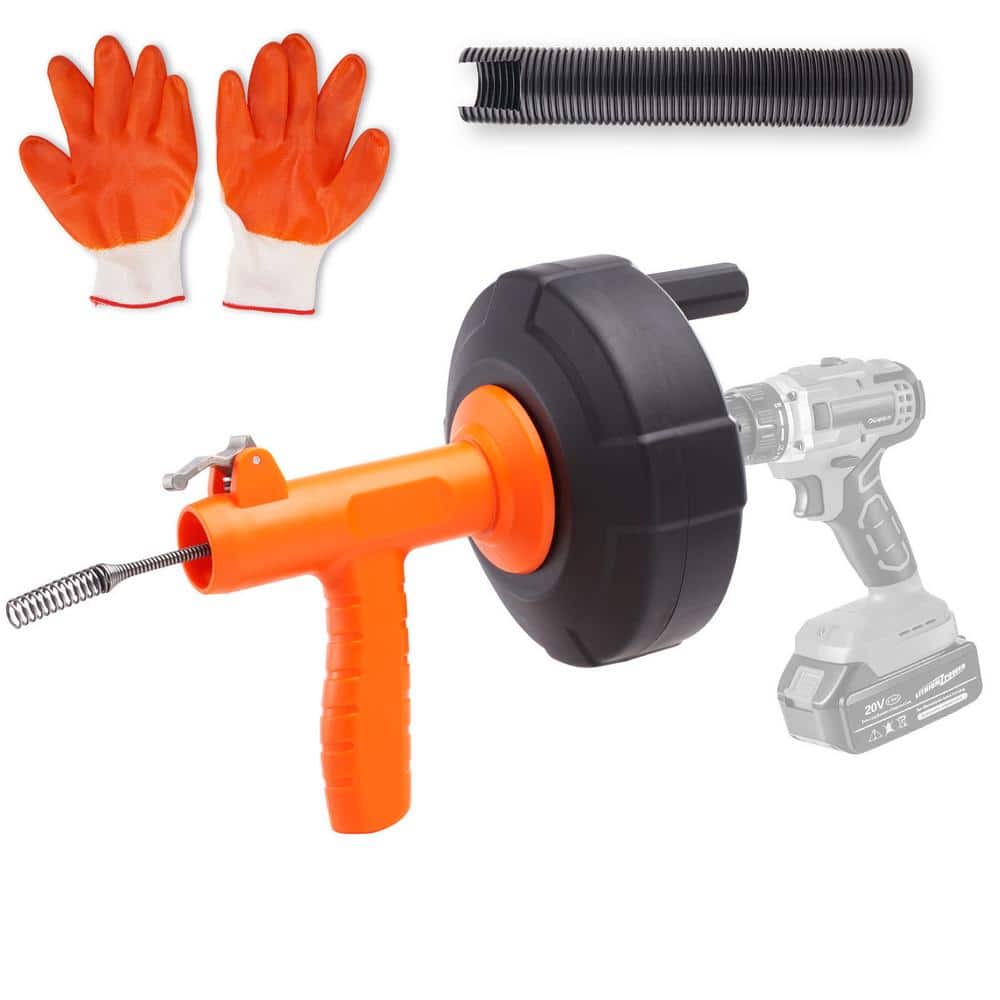
Some modern augers accept a power drill attachment at the handle. This increases rotation speed and makes cutting through tough clogs easier. Use low RPM settings and proceed cautiously, since excessive speed can damage pipes or porcelain.
Replace Worn Components Promptly
If the cable no longer feeds smoothly, the handle wobbles, or the boot is missing, replace the auger. A malfunctioning tool wastes time and risks bathroom damage.
Call a Plumber for Complex Issues
Seek professional help in these situations:
- The toilet bowl is cracked
- Sewage backs up into other fixtures
- Tree root intrusion or collapsed piping is suspected
- Handling biohazard materials feels uncomfortable
Plumbers charge $200 or more for basic unclogging, making a reliable auger a smart long-term investment.
Frequently Asked Questions About Toilet Augers
What is the difference between a toilet auger and a drain snake?
A toilet auger features a protective rubber boot and curved housing designed specifically for toilet bowls. Drain snakes lack this protection and can scratch porcelain. Toilet augers also have the right length and rigidity for navigating toilet traps without causing damage.
Can a toilet auger damage the toilet?
Yes, if used incorrectly. Forcing the cable or letting the metal shaft touch the porcelain causes scratches or cracks. Always use gentle pressure, keep the rubber boot pressed against the bowl, and rotate clockwise when advancing the cable.
How deep can a toilet auger reach?
Standard household toilet augers reach 3 to 6 feet, which covers the toilet trap (10 to 12 inches deep) and the immediate drain line. This reach handles most toilet-specific clogs but cannot access main sewer line blockages.
What if the auger does not clear the clog?
Try a second complete augering cycle. If the clog persists after two attempts, the problem likely lies in the main sewer line. Call a licensed plumber who can use a motorized snake or camera inspection to diagnose deeper issues.
How do I clean and store a toilet auger?
Rinse the cable with hot water, wash with soapy water and disinfectant, and dry thoroughly. Apply a light coat of machine oil to prevent rust, retract the cable fully, and store in a dry location away from humidity.
Is a toilet auger worth buying?
Absolutely. A quality toilet auger costs between $50 and $60 and lasts decades with proper care. It resolves most toilet clogs in minutes, saving hundreds of dollars in plumber fees and preventing water damage from overflows.
Key Takeaways for Mastering Toilet Auger Use
Knowing how to use a toilet auger transforms a stressful plumbing emergency into a manageable DIY repair. Start with proper protective gear and a quick tool inspection. Insert the auger with the rubber boot sealed against the porcelain, then advance the cable using steady clockwise rotation. Break up soft clogs with persistent rotation, or reverse direction to retrieve solid objects.
Clean and dry the tool thoroughly after every use, then store it in a dry, accessible location. Keep the auger within easy reach rather than buried in storage, so you can act fast when a clog appears. With this knowledge and the right technique, you can clear most toilet blockages in under 15 minutes and keep your bathroom running smoothly for years to come.