
You’re finally ready to install that double vanity, but the toilet sits right where the new cabinet needs to go. Learning how to move a toilet is the only way to reclaim that space without sacrificing your bathroom layout. Done wrong, you risk leaks, code violations, or a cracked flange. Done right, you get a quieter, sturdier, better-fitting bathroom.
This guide walks you through every phase of moving a toilet, from measuring clearance and calculating drain slope to cutting concrete, patching subfloor, and passing final leak tests. You’ll learn which fittings to use, which mistakes cost DIYers the most time, and how to keep your installation solid, silent, and up to code.
Plan the New Toilet Location and Measure Clearances
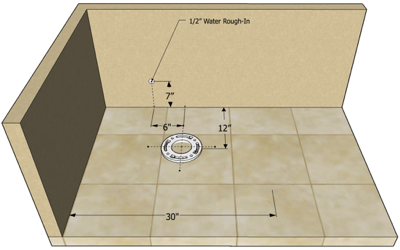
Before picking up a single tool, confirm the new spot meets code and comfort standards. The center of the toilet flange must sit 15 inches from the finished wall, no less. This rule applies whether you’re moving a toilet a few inches or several feet.
If you’re adding a vanity, leave 30 inches from the vanity edge to the adjacent wall. Centering the toilet between side walls at 15 inches each creates balanced access in narrow spaces. Front clearance matters too. Leave at least 21 inches between the bowl and any opposing wall or fixture to avoid that cramped, knees-against-the-door feeling.
Verify Joist Direction and Access Below
Locate your floor joists before planning the drain path. Joists typically run 16 or 24 inches on center. Use a stud finder or drill a small test hole to confirm direction and spacing. The new flange must land over solid support, ideally a joist or a reinforced subfloor.
Check what’s underneath. A crawl space makes rerouting pipes far easier. A slab foundation means cutting concrete, which adds time, dust, and noise. No access below? You may need to open walls or ceilings in lower levels to reach the drain.
Calculate Drain Slope Before You Commit
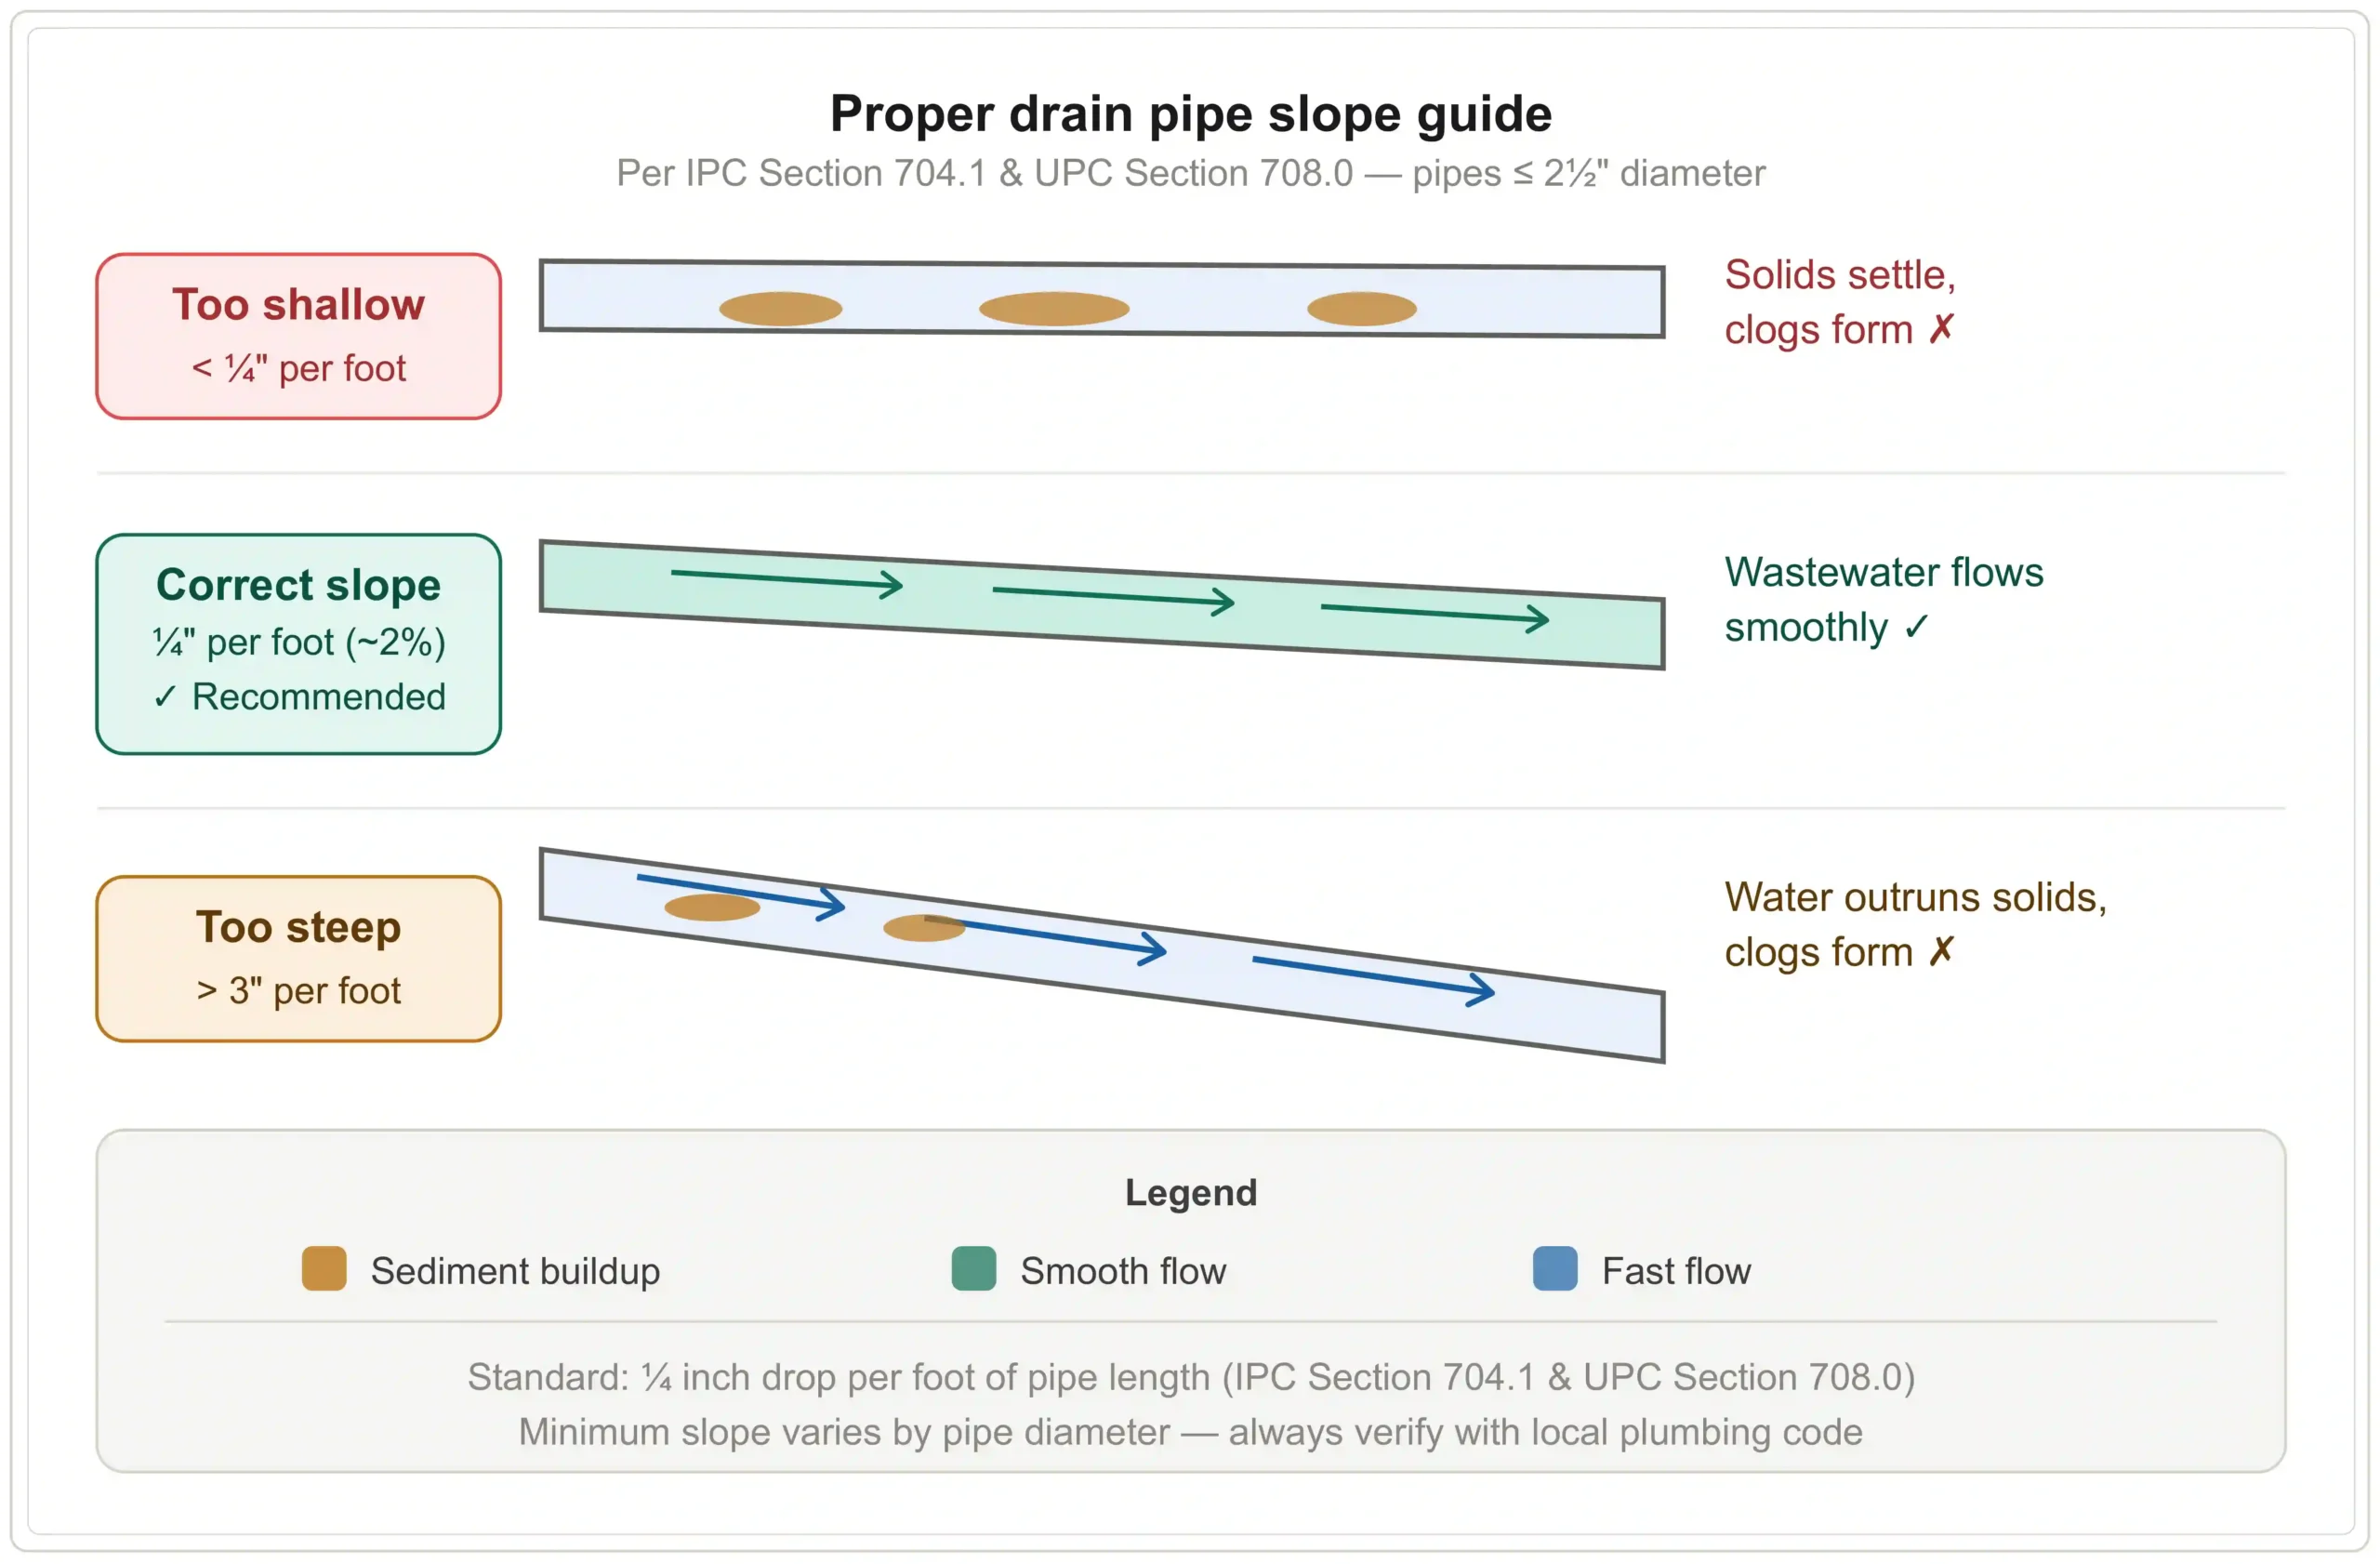
The waste pipe must slope ¼ inch per foot toward the main stack. Less slope risks clogs; more wastes vertical space. Measure the available drop from your floor to the nearest downward pipe turn.
Use this formula: Max Move Distance = Total Vertical Drop ÷ 0.25. For example, a 10-inch drop allows up to 8 feet of horizontal run. Some jurisdictions permit 1/8 inch per foot, extending reach but increasing clog risk. If your planned move exceeds the calculated distance, the project may require raising the floor or lowering the ceiling below, both major structural changes.
Gather Tools and Materials for the Job
Essential Plumbing Supplies
Buy 3-inch ABS or PVC pipe for the waste line, not 4-inch. Confusing the two is the most common DIY mistake. Confirm diameter at the store before cutting. You’ll also need:
- 45° and 22.5° elbows for smoother flow than 90°
- Street 90° fittings for low-profile slab installs
- Couplings and PVC cement matched to your pipe material
- A solid one-piece flange (avoid swivel types)
- A wax ring or wax-free seal
- PEX tubing and crimp rings for the water supply
- A sweat-by-PEX adapter if connecting to copper
- A Shark Bite cap for temporary shutoff
Structural and Floor Repair Items
Match the existing subfloor thickness, often 1.375 inches (1 3/8″). Stock:
- Plywood or OSB for patches
- 6″, 12″, and 16″ wood nailers to reinforce edges
- ½-inch shims for tile floor height adjustment
- Lexel or equivalent bonding compound to seal joints
- Concrete mix for slab repairs
- Brass T-bolts to secure the toilet
Required Tools
- Circular saw with diamond blade for tile and concrete
- Jigsaw for precise floor cuts
- Pipe cutter and hacksaw
- Drill with bits and driver
- Level for slope checks
- Measuring tape
- Crimp tool for PEX connections
- Torch if soldering copper
- Chipping hammer or electric breaker for slab work
- Safety gear including gloves, eye protection, earplugs, and a dust mask
Cut the Floor and Expose the Existing Pipe
Shut off the water, flush the toilet, and disconnect the supply line. Remove the toilet and set it aside carefully. Cut a square in the finished floor and subfloor around the flange using a circular saw or jigsaw.
Expose the 3-inch waste pipe and inspect its path relative to the joists. Confirm the flange is bolted over a joist. If the new spot misses support, install blocking between joists to carry the load.
Reroute the Waste Pipe on a Wood Subfloor
Use Angled Fittings for Smoother Flow
Cut the existing pipe with a hacksaw. For short moves under 5 feet, a coupling and 45° elbows extend the line cleanly. Avoid 90° turns in horizontal runs; they trap waste and create turbulence.
For longer runs, assemble a path with couplings and angled fittings. Leave slight gaps to adjust alignment before gluing. Maintain ¼ inch per foot slope using a level. In Canada, total bends from toilet to vent must not exceed 225 degrees, so a 90° + 45° combo is acceptable.
Glue all joints with PVC or ABS cement. Wipe excess immediately. Let the assembly cure for 24 hours before testing.
Reinforce and Patch the Subfloor
Install wood nailers between joists, screwed securely. Cut plywood to fit the opening, matching the original thickness. Apply Lexel to all edges before setting the patch. This step prevents squeaks and creates a solid bond.
Screw the patch every 6 inches along joists. Sand it flush with the surrounding floor before installing the flange.
Install the New Flange at the Correct Height
Position the flange so its center is 15 inches from the finished wall. On wood or laminate, screw it directly to the subfloor. On tile, place it on top and use shims if needed to sit flush with the finished surface.
Use a solid one-piece flange, not a swivel. Glue it to the waste pipe, then secure with screws. Confirm it sits level and doesn’t rock.
Move a Toilet on a Concrete Slab
Mark and Cut the Concrete Trench
Remove the toilet and vanity. Mark the new trench path: wide enough for the pipe (about 12 inches) and deep enough to allow proper slope. Score the perimeter with a circular saw and diamond blade, cutting over 2 inches deep.
Use water to cool the blade and reduce dust. Wear gloves and eye protection. Always plug tools into a GFCI outlet when working near moisture.
Break and Remove the Concrete
Break the scored section with a chipping hammer or sledgehammer. Clear debris to expose the existing hub, the vertical pipe stub in the slab. Clean it with sandpaper and leave about 1 inch of hub for gluing.
If the hub sits too high, cut it flush with the slab using a circular saw and straight edge, like a paint stirrer. Target a ¾-inch reduction to fit new fittings without protruding above the floor.
Install Low-Profile Fittings and Pour Concrete
Use street 90° fittings (female-to-male) to save vertical space. Standard elbows add height and may stick above the slab. If the flange sits loose in a 4-inch pipe, glue in a short spacer pipe to raise it to the correct height.
Route the new 3-inch pipe with ¼ inch per foot slope toward the main line. Glue all joints and support the pipe with dirt or foam to prevent shifting before pouring concrete.
Tamp soil back into the trench to reduce concrete volume. Mix and pour fast-setting concrete to slab height. Screed smooth with a 2×4. Let it cure fully, usually 24 to 48 hours, before walking on it or installing fixtures.
Relocate the Water Supply Line

Shut Off and Drain the System
Turn off the main water supply. Open bathroom and kitchen faucets to drain pressure. Close them once water stops flowing.
Cut and Extend the Line
In the crawl space or wall, cut the existing supply line, whether PEX or copper. If switching from copper to PEX, install a sweat-by-PEX adapter. Clean and dry the copper thoroughly before soldering.
For PEX-to-PEX connections, use crimp or push-fit connectors. Run the new PEX line to the toilet’s new location. Avoid sharp bends and use sweeping curves instead.
Secure and Terminate the New Line
Fasten PEX to joists with Mickey clips, which are required by code in Canada. Don’t use standard staples. End the line at the new location with a shutoff valve. Cap it with a Shark Bite cap if testing is delayed.
Once the toilet is set, connect the supply line and check for leaks.
Reinstall the Toilet and Run Leak Tests
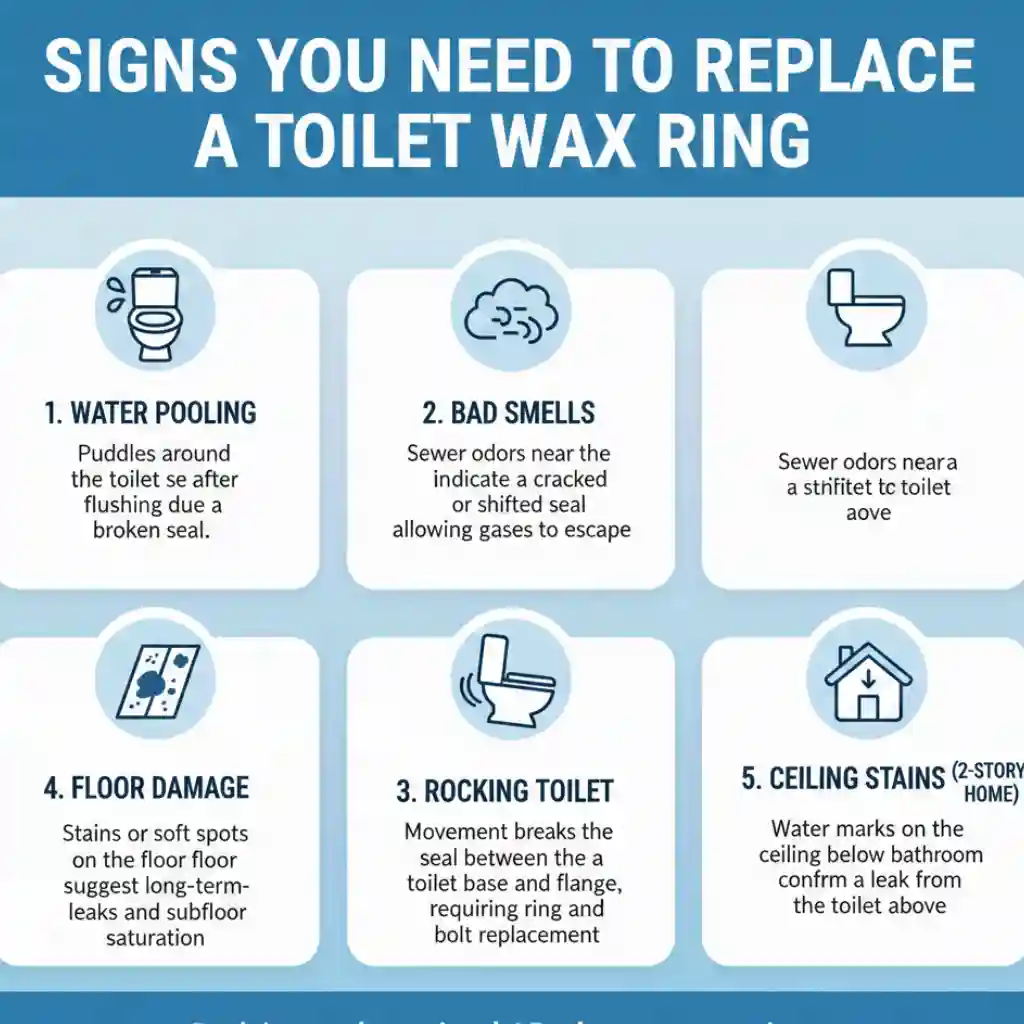
Set the Toilet on the New Flange
Place a new wax ring (or wax-free seal) on the flange. Lower the toilet straight down, aligning the bolts. Press down firmly to compress the seal. Don’t rock it side to side.
Hand-tighten brass T-bolts, then snug them with a wrench. Do not overtighten, as this can crack the porcelain or break the flange.
Caulk the Base
Apply a clean bead of silicone around the base for a finished look and to prevent water from wicking under the toilet. Many pros leave the back uncaulked to spot leaks early. Your call.
Conduct a Thorough Leak Test
- Turn on the water and fill the tank.
- Flush 3 to 5 times.
- Check these points:
– Base of the toilet (wax seal)
– Flange-to-pipe connection
– Water supply valve and connections
– All glued joints (from below if accessible)
Wait 24 hours if using ABS cement before heavy use. Look for damp spots, drips, or sewer odors.
Fix Common Problems When Moving a Toilet
Flange Sits Too High on a Slab
If fittings stick above the concrete, use street fittings or cut the hub flush. A spacer pipe can fine-tune height to the perfect level.
Pipe Hits a Joist
If the new path crosses a joist, drill a hole through it (max 1/3 depth). Never notch the top or bottom. If the flange lands between joists, install blocking for support.
Not Enough Slope for the Distance
If vertical drop is limited, check whether 1/8 inch per foot is allowed in your area. If not, the move may require raising the floor or lowering the ceiling. Consult a pro before proceeding.
Swivel Flange Keeps Leaking
Avoid swivel flanges entirely. They shift and crack over time. Use a solid one-piece flange glued and screwed in place.
Squeaky Floors After the Repair
Prevent squeaks by sealing subfloor joints with Lexel and reinforcing with nailers. Screw patches tightly every 6 inches for a rigid, silent floor.
Follow Plumbing Codes and Safety Rules
Maintain Proper Venting
The new drain must tie into the vent stack within code distance, usually within 5 to 6 feet. Without proper venting, traps siphon dry and allow sewer gas into the home.
Limit Horizontal Bends
Total bends from the toilet to the first vertical drop must not exceed 225 degrees in many jurisdictions. Use 45° or 22.5° fittings to stay under this limit.
Protect Electrical Systems
When cutting concrete or working near water, use GFCI outlets and double-insulated tools. Keep cords dry and elevated at all times.
Preserve Structural Integrity
Never cut joists without reinforcement. Sister new lumber alongside or install blocking. A weak floor leads to cracks, leaks, and costly repairs down the road.
Practice Hygiene and Safety
Wear disposable gloves when handling the wax ring or old flange. Never reach into sewer lines. Use eye protection when cutting tile or concrete.
Frequently Asked Questions About Moving a Toilet
How much does it cost to move a toilet?
DIY material costs run about $80, excluding the toilet and vanity. Professional labor costs significantly more, especially for slab foundations or complex reroutes.
Can a toilet be moved 2 feet?
Yes, a 2-foot move is usually feasible if you have enough vertical drop for proper slope. Measure the available drop first to confirm the move fits within the ¼ inch per foot rule.
Do I need a permit to move a toilet?
Most jurisdictions require a plumbing permit for relocating a toilet. Check with your local building department before starting work to avoid fines or failed inspections.
How long does it take to move a toilet?
A simple move takes about 5 hours for an experienced DIYer. Add time for store runs, concrete curing, or unexpected structural surprises.
What if my bathroom is on a concrete slab?
Slab foundations require cutting concrete, which adds significant labor, dust, and noise. Use street fittings to keep the assembly low and pour fresh concrete to repair the trench afterward.
Can I move a toilet myself or should I hire a plumber?
Simple moves on wood subfloors with crawl space access are manageable for skilled DIYers. Slab foundations, major reroutes, or code uncertainty call for a licensed plumber.
Key Takeaways for a Successful Toilet Move
Learning how to move a toilet comes down to three essentials: precise planning, proper materials, and patient execution. Measure clearances and slope before cutting anything. Use 3-inch pipe, angled fittings, and a solid one-piece flange to avoid the most common DIY failures. Reinforce every subfloor patch with nailers and bonding compound to prevent future squeaks.
Your next step is to map your new layout, calculate the drain slope, and build a detailed materials list. Once you have those locked in, the actual work moves quickly. If you hit unexpected obstacles like hidden pipes or insufficient drop, pause and call a licensed plumber. Safety and code compliance always come first.