
If your Bio Bidet seat is malfunctioning, cracked, or simply outdated, replacing it can restore comfort, hygiene, and functionality to your bathroom. Whether you’re swapping the entire unit or replacing a worn damper or wiring harness, the process is designed for DIY success. This guide walks you through every stage, from safe disconnection and component removal to clean installation and final testing. You’ll learn how to avoid leaks, prevent electrical issues, and even claim free parts under warranty.
No plumbing or electrician needed. With clear steps, pro tips, and model-agnostic advice, you’ll have your bidet working like new in about 20 minutes.
Essential Tools & Preparation
Gather Required Tools
Before touching any hardware, assemble these tools. All are standard household items, so no specialty gear is required.
You will need:
– Phillips #2 screwdriver with magnetic tip
– Flat-head screwdriver
– Needle-nose pliers
– Zip-tie for wire management
– Bucket to catch residual water
– Cleaning cloth or antibacterial wipe
– Camera or phone for documenting wire paths
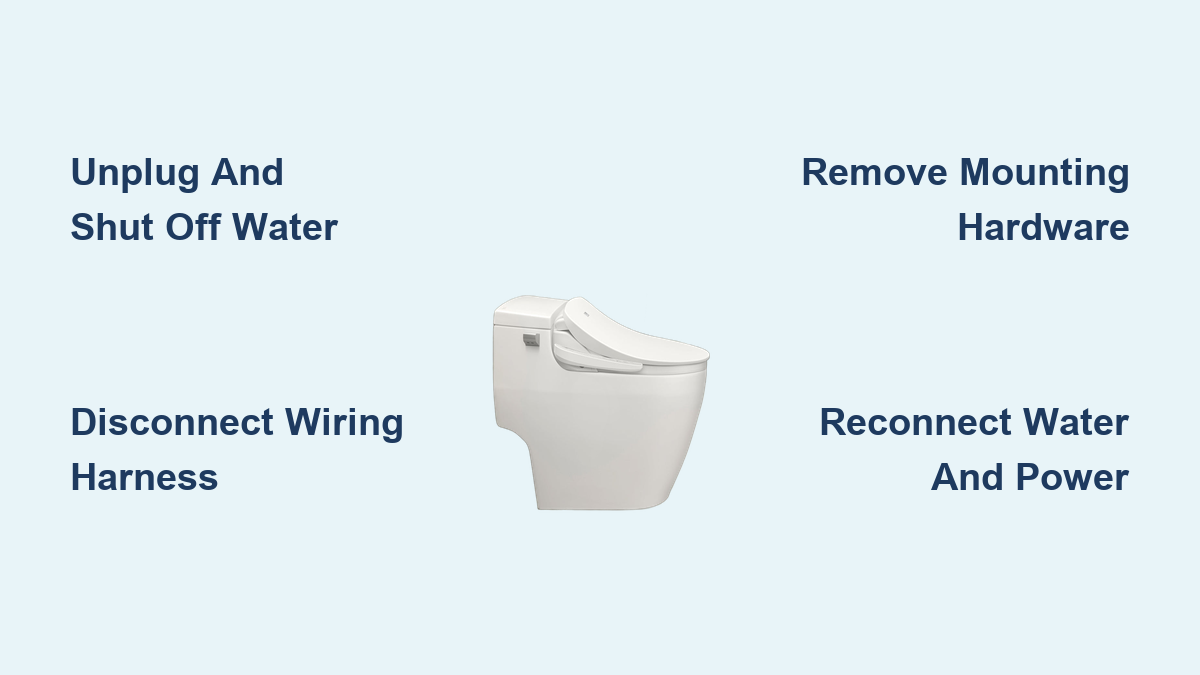
Power Down and Shut Off Supply
Safety comes first. Follow this shutdown sequence to eliminate shock risk and prevent damage to internal components.
Unplug the bidet from the wall outlet. Wait at least 60 minutes, especially if the seat has heated water, to let internal components cool. Turn off the water supply valve located behind the toilet near the floor. Drain the tank by pressing the half-circle button on the side of the seat.
Never skip draining. Residual water can damage heating elements during maintenance.
Remove the Old Bio Bidet Seat
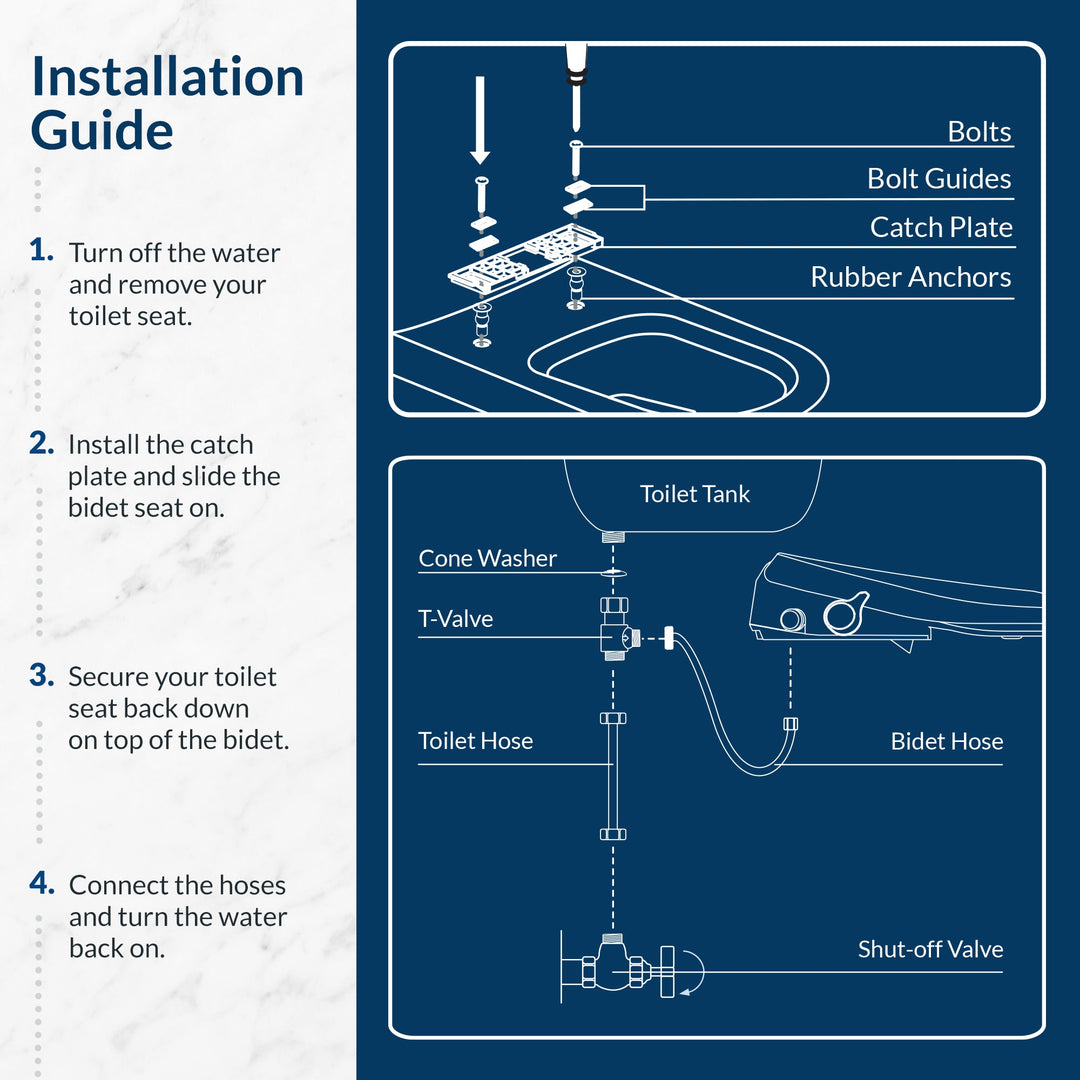
Disconnect Mounting Hardware
Start by freeing the seat from the bowl. This step gives you access to all connection points.
Unscrew the mounting nuts by hand and keep them in a labeled container. Flip the toilet lid over to access the mounting bracket. Use a flat-head screwdriver to pry up two front and two rear tabs securing the bracket to the bolts. Gently lift the seat upward, possibly tilting slightly backward to clear hinge mechanisms.
Pro tip: Take a photo before disassembly to remember bracket tab alignment.
Detach Water and Power Lines
Once the seat is free, disconnect all connections. These connectors are reusable and designed for multiple insertions.
Disconnect the water supply line from the inlet on the bidet base. Inspect the rubber gasket inside the connector to ensure it stays seated, preventing future leaks. Locate the three-color wiring harness: white, yellow, and black. Use needle-nose pliers to press the release tabs and disconnect each wire. Do not cut the wires.
Remove the Hinge Assembly
This step is essential for full replacement and internal repairs. Set aside all screws and hardware.
Unscrew the two Phillips screws on the side of the seat that secure the hinge. Gently pull the hinge piece out. Do not discard any hardware.
Replace Internal Components: Damper Repair
Disassemble the Seat
If only replacing the damper, which controls the slow-close mechanism, follow these steps. Work slowly to avoid cracking plastic.
Press the half-round button on the seat side. Pull the seat forward off the toilet bowl. Slide the lid to the right until it clears the right-side lip and remove it. Remove the two Phillips #2 screws from the back of the seat. Gently pry the housing apart. Do not use a drill.
Remove and Replace the Damper
The damper is a small piston near the hinge that controls lid movement. This is a common wear item that cracks over time.
Remove the three screws holding the damper in place. Take off the red O-ring to allow wire passage. Extract the cracked or worn damper. Insert the new damper into the slot and adjust the angle for smooth motion. Reinstall the three screws and hand-tighten only. Replace the red O-ring against the bottom lip to maintain water resistance.
Check the lid: it should close slowly and silently with no grinding or sticking.
Reconnect Damper Wires
Reconnecting wires correctly ensures proper function. Follow this color-coded guide precisely.
Black and green wires go to the bottom of the circuit board. The yellow wire connects to the top. To disconnect: press the tab and pull black first, then green. To reconnect: push firmly until you hear a click, then perform a gentle tug test.
Do not disconnect the sealed plug. It is weatherproof and not user-serviceable.
Install the New or Repaired Seat
Feed and Manage Wires
Before mounting, route the wires through the opening in the seat base, matching the original path. This prevents snagging during operation.
Optional: Use a zip-tie to bundle wires together and prevent tangling when lifting the seat. Neat wiring ensures smooth operation and reduces wear over time.
Insert the Rotator Hinge
Position the hinge with the flat side down. Align the keyhole notch with the side slot on the seat. Adjust by hand. This may require one-handed manipulation for proper seating.
Ensure the hinge sits flush before proceeding to the next step.
Secure the Hinge Screws
Use a magnetic screwdriver to guide the two Phillips screws into the hinge holes. Hand-tighten only. Overtightening can strip plastic threads.
A snug fit is sufficient. The seat is designed for secure, tool-free adjustments later.
Reconnect the Wiring Harness
Snap the white, yellow, and black wires back into their clips. Press until each clicks securely. Perform a tug test. Wires should not pull out.
Connections must be firm to prevent intermittent power or function failures.
Reattach the Lid
Align the front of the lid with the mounting tabs. Press down firmly until it clicks into place. Reinstall the two Phillips #2 screws and hand-tighten.
Test the lid’s slow-close function immediately after reassembly.
Final Mounting and Testing

Mount the Seat to the Toilet Bowl
Place the seat onto the bowl bolts. Re-engage the mounting bracket and bolts. Install tapered plastic washers with the wide side facing up. Hand-tighten all nuts. Do not use a wrench.
Over-tightening can crack porcelain. The seat should be secure but still adjustable.
Reconnect the Water Supply
Reattach the supply line to the bidet inlet. Confirm the rubber gasket is properly seated. Hand-tighten the connection. Over-torquing can damage the fitting.
Slowly turn on the water valve. Check for leaks around the connection point. If dripping occurs, disconnect, reseat the gasket, and retry.
Restore Power and Test Functions
Plug the bidet back into the outlet. A brief flash of indicator lights is normal and not a defect.
Now test all features:
– Front and rear spray nozzles
– Water temperature control
– Seat heating
– Dryer function if equipped
– Control panel responsiveness
Verify no electrical buzzing, water leaks, or error codes appear.
Confirm Slow-Close Operation
Open and release the lid. It should close smoothly and silently. If it slams or sticks, recheck damper alignment and screw tightness.
This function enhances safety and longevity.
Claim Warranty and Upgrade Options
Access Free Warranty Support
Bio Bidet seats are covered under a 3-year full-coverage warranty. This covers defects including cracked dampers, electrical faults, and mechanical failures. No cost to repair or replace.
To file a claim, call the number on the underside of the seat. Send photos of the damaged part. Receive free replacement parts in a few days.
Most users receive parts within 3 to 5 business days.
Consider Model Upgrades
Replacing your seat is also a chance to upgrade. Moving from BB-600 to BB2000 gains heated water, adjustable spray, remote control, and extended support.
Higher-tier models often include longer warranty and priority customer service. Even if your old model is under warranty, upgrading may offer better long-term value.
Universal Tips for All Models
Identical Process Across Brands
The replacement process is nearly identical across Bio Bidet models and comparable brands like TOTO and Brondell. Core components including hinges, dampers, and wiring layouts are standardized.
Once you have done one, you can service most electronic bidet seats.
Pro Tips for Success
Several practices ensure success. Document everything before disassembly. Take photos or videos of bracket tabs, wire routing, and gasket placement. This saves time during reassembly and prevents mistakes.
Avoid over-tightening. All plastic screws and nuts should be hand-tightened only. Use a magnetic screwdriver to avoid dropping screws into tight spaces.
Prevent leaks by always inspecting and reseat the rubber gasket. Turn water on slowly to detect leaks early.
Clean during maintenance. Wipe down the underside of the seat and toilet rim while it is off. Use antibacterial wipes to sanitize nozzles and touchpoints.
Frequently Asked About Replacing a Bio Bidet Seat
How Long Does It Take to Replace a Bio Bidet Seat?
Most replacements take about 20 minutes with basic tools. Component-level repairs like damper replacement may take slightly less time. The process is designed for DIY success without prior experience.
Can I Replace Just the Damper Instead of the Entire Seat?
Yes. The damper controls the slow-close function and is a common wear item. You can replace it without removing the full seat by following the disassembly steps in this guide. Bio Bidet ships free replacement parts under warranty.
Do I Need a Plumber to Replace My Bio Bidet Seat?
No. The entire process uses basic hand tools and requires no plumbing or electrical experience. Simply follow the safety steps, disconnect water and power, then complete the replacement. No professional help needed.
What Tools Are Required for Bio Bidet Seat Replacement?
You need a Phillips #2 screwdriver, flat-head screwdriver, needle-nose pliers, and optionally a magnetic-tip screwdriver. A bucket, cleaning cloth, and zip-tie are also helpful. All tools are standard household items.
How Do I Know If My Bio Bidet Is Still Under Warranty?
Bio Bidet seats typically come with a 3-year full-coverage warranty. Check the underside of your seat for the warranty phone number. Contact them directly with photos of the damaged part to receive free replacements.
What Should I Do If the Seat Leaks After Installation?
First, disconnect the water supply. Remove and inspect the rubber gasket inside the connector. Ensure it is properly seated and not damaged. Reconnect and hand-tighten. Turn water on slowly and check for leaks. If leaking persists, repeat the process or replace the gasket.
Key Takeaways for Replacing Your Bio Bidet Seat
Replacing a Bio Bidet seat is a fast, safe, and cost-effective DIY task. With the right preparation, you can complete a full swap or component repair in under 20 minutes.
Always unplug the bidet and wait for cooling before starting. Shut off water, drain the tank, and document your wire routing before disassembly. Hand-tighten all plastic components to avoid cracking.
The warranty covers free parts for 3 years. Contact Bio Bidet directly with photos of damaged components to receive replacements at no cost.
By following these steps, you will avoid leaks, ensure electrical safety, and extend your bidet’s life. Take control of your bathroom tech. No plumber or technician needed.