
If your Bio Bidet heated seat not working, you’re not alone. This issue affects multiple models, especially the BB-600 and USPA 6800, and can stem from simple settings errors to permanent hardware failure. The good news: many problems are fixable without replacing the entire unit. This guide walks you through step-by-step troubleshooting, proven repairs, and full replacement procedures based on real user experiences and technical data.
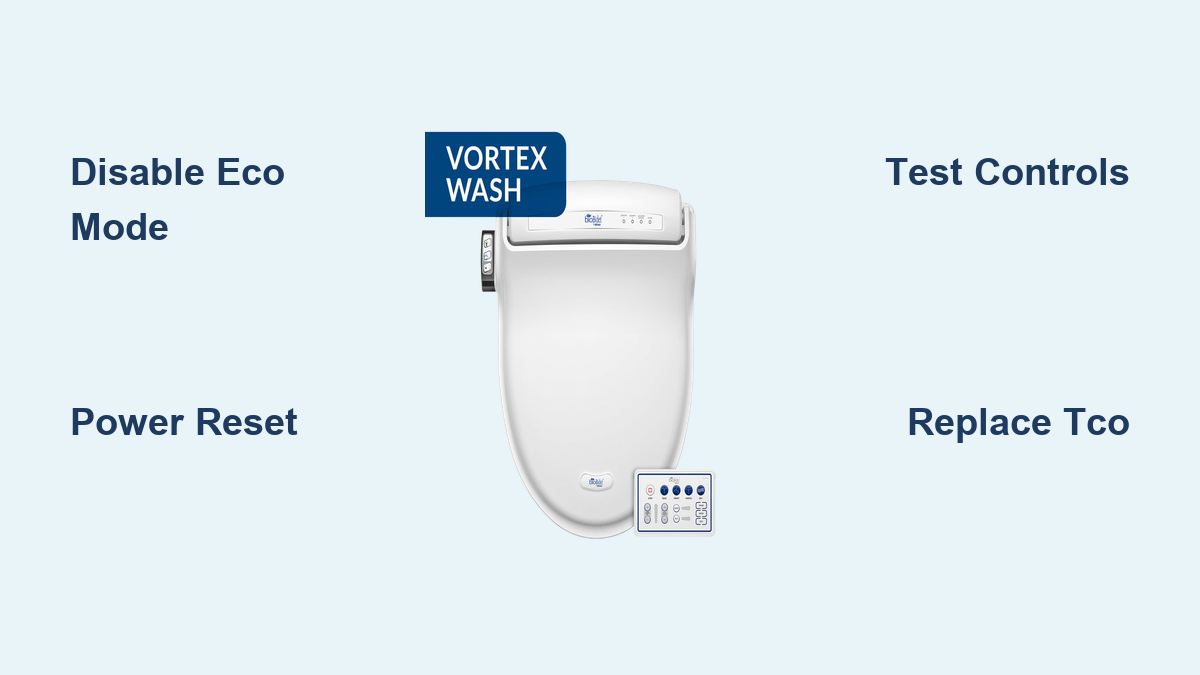
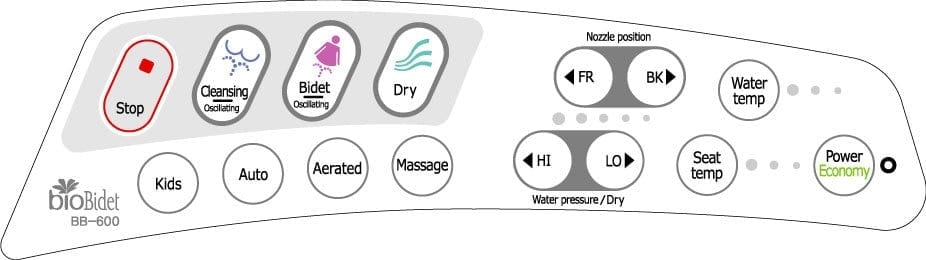
Disable Eco Mode First
Before assuming hardware failure, rule out Eco Mode interference. This is the most common cause of perceived heating issues in Bio Bidet units.
Turn Off Power Saving Mode
Press the “Eco” button on your remote until the indicator light turns off. Also check side-mounted buttons, as some models have separate Eco settings for seat and water heating. Wait 5 to 10 minutes after disabling, as the seat should begin warming gradually.
Pro Tip: Even if the display shows normal operation, Eco Mode cycles heat to save energy, making the seat feel cold intermittently. Fully disabling it often resolves the issue instantly.
Perform a Power Reset
A soft reset clears temporary glitches in the control board that may block heating functions.
Unplug and Wait
Unplug the Bio Bidet from the power outlet. Wait at least 5 minutes, though 30 minutes is better for full capacitor discharge. Plug back in and allow the system to reboot, which takes about 1 minute. Test seat heating using side panel controls.
Why this works: Resets microcontroller errors, restores default heating cycles, and reinitializes sensor communication. This step fixes many cases where both remote and seat controls stop responding.
Test Remote vs. Side Controls
Communication issues can mimic hardware failure. Test both control methods to isolate the problem.
Check Control Response
Use the remote by replacing batteries if dim or unresponsive. Press physical buttons on the side of the seat to compare results.
If only the remote fails, the issue is likely dead batteries, signal interference, or a failed remote unit. If both controls fail, the problem is likely an internal circuit fault, thermal cutoff failure, or power delivery issue.
Visual cue: If LED indicators do not light up on either control method, power or internal wiring is likely interrupted.
Inspect Power Source and Outlet
Even minor electrical issues can disable heating functions. Verify the power supply before proceeding to deeper diagnostics.
Verify Electrical Supply
Ensure the unit is fully plugged into the outlet. Test the outlet with another device, such as a phone charger. Check if the GFCI outlet has tripped and reset if necessary. Avoid using extension cords or multi-plug adapters.
Critical: Use a dedicated GFCI outlet with surge protection. Voltage spikes are a leading cause of thermal cutoff failure in Bio Bidet units.
Factory Reset for Advanced Models
For smart models like the BB-1000 Supreme, a factory reset resolves firmware-level lockups that standard resets cannot fix.
Full System Reinitialization
Remove batteries from the remote. Shut off water supply and unplug the unit, then wait 30 minutes. Press and hold the drain tab on the lower right near the power cord until water stops draining. Leave the unit unplugged for several hours.
Restore water supply, wait 30 seconds, then plug in. After startup, press and hold the Stop button on the side panel for 10 seconds until lights flash and stabilize. Wait 3 minutes before testing functions.
Outcome: Restores default settings, clears corrupted memory, and often revives non-responsive heating functions.
Diagnose Thermal Cutoff Failure
If all basic steps fail, thermal cutoff switch failure is the likely culprit, especially in BB-600 units.
Recognize TCO Symptoms
The seat shows no heat despite correct settings. The unit powers on normally with working lights, spray, and dryer functions. Heating loss occurs suddenly with no warning. Multiple users report the same issue across different units.
Fact: The TCO (DF91S, 91°C) is a safety fuse that breaks the heating circuit permanently when triggered by power surges or outages, even with surge protectors in place. Once failed, it cannot reset itself and must be replaced.
Replace Thermal Cutoff Switch (BB-600 Repair)

You can repair a dead heated seat by replacing the internal TCO. No need to replace the entire unit.
Cut Access Hole Safely
Remove the bidet from the toilet. Locate the thickest section of the seat base near where power wires enter. Use a 1 3/4-inch hole saw to cut an access port. Remove the drill bit from the hole saw to prevent over-penetration. Use a jig or tape guide to prevent slipping. Cut carefully to avoid damaging internal wires.
Replace Failed TCO
Identify the small cylindrical component (DF91S) inline with heating wires. Cut it out rather than attempting to desolder, as the plastic housing melts easily. Crimp in a new TCO using insulated connectors. The part is DF91S, DYE, 91°C, 15A/120V, available on eBay and electronics suppliers. Insulate all connections with electrical tape and bundle wires neatly.
Seal and Reinstall
Insert a plastic hole plug (available on Amazon) to close the access hole. Reattach the bidet to the toilet. Power on and test heating after 5 minutes.
Success Rate: Verified by multiple users with full heat restored long-term.
Avoid Common Repair Mistakes
DIY repairs can go wrong without proper precautions. Follow these guidelines to avoid costly errors.
Key Warnings
Do not guess the cut location, as only one spot provides safe access. Cutting elsewhere risks wire damage. Do not solder inside the plastic housing, as heat warps materials and creates fire risks. Do not skip insulation, as exposed wires can short-circuit. Use crimp connectors only, as they are safer and more reliable in confined spaces.
User Experience: One repairer made three failed cuts before finding the correct spot, emphasizing the importance of precision.
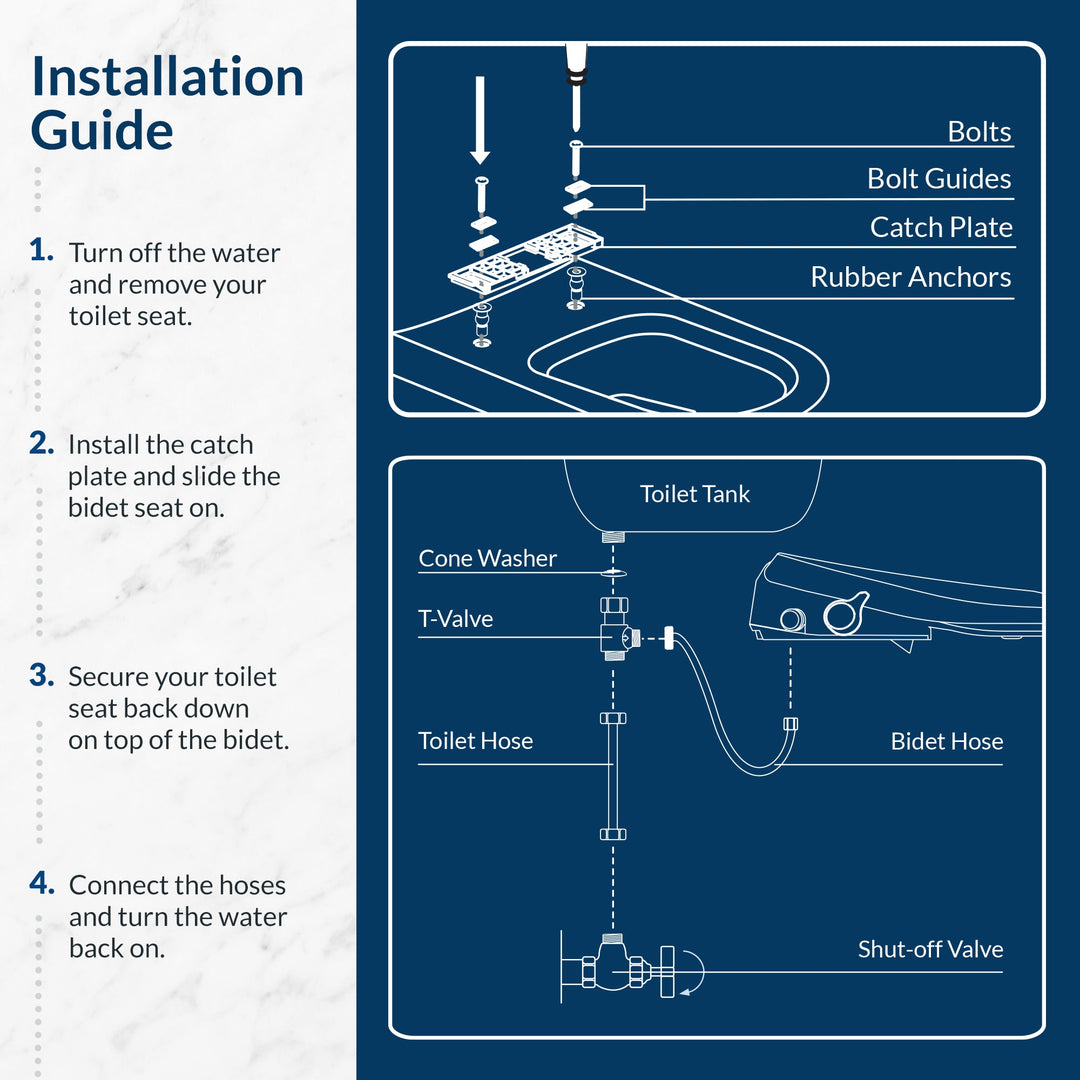
Full Seat Replacement Procedure
When repair is not possible due to heating element burnout or unavailable parts, replace the full seat assembly.
Prepare for Replacement
Shut off the water supply and flush the toilet to reduce pressure. Unplug the power cord. Install a shutoff valve if missing to ease future maintenance.
Remove Old Seat
Slide the tray forward to expose the mounting plate. Open the bottom drain plug and use a towel to catch water. Pry open the bottom panel to access the four recessed screws. Remove the screws and lift the seat straight up to avoid wire strain. Disconnect the harness by matching black to black, yellow to yellow, pink (2-pin) to white wire, and double black/yellow to the final connector.
Install New Seat
Route wires through the hinge channel to prevent kinking. Reconnect in order: 2-pin connector first, then 3-pin connector, and finally the double-black connector. Secure wires with a tie clip to prevent pinching in the hinge area. Reinstall the soft-close hinge by removing the sensor assembly, aligning the secondary connector correctly, and reattaching the bolts.
Test All Functions
Power on and test seat heating, water spray, dryer, and remote function. Check for leaks around the water connection. Verify all controls respond properly.
Prevent Future Failures
Protect your investment with proper installation and maintenance practices.
Protect Your Investment
Use a high-quality surge protector, though it is not 100% effective. Avoid unplugging during storms or outages. Install a dedicated GFCI outlet near the toilet. Add a water shutoff valve for easier maintenance. Clean around the base monthly to prevent moisture buildup.
Long-Term Tip: Newer bidet models have better surge protection. Consider upgrading if failures recur frequently.
Frequently Asked Questions About Bio Bidet Heated Seat Issues
Why is my Bio Bidet seat not heating even though it powers on?
The most likely cause is Eco Mode being enabled, which cycles heat intermittently. Check and disable Eco Mode on both the remote and side buttons. If that does not work, perform a power reset by unplugging for 30 minutes.
Can I fix a Bio Bidet heated seat myself?
Yes, many issues are fixable DIY. The BB-600 model can be repaired by replacing the thermal cutoff switch (TCO) using a hole-saw access method. Basic troubleshooting like Eco Mode disable and power reset often resolves the issue without disassembly.
How much does Bio Bidet seat replacement cost?
Replacement seats are no longer available directly from Bio Bidet for some models. Third-party options vary, but full seat replacement typically costs less than buying a new unit. The TCO replacement part (DF91S) costs approximately $10 to $15 on eBay.
What causes the thermal cutoff to fail?
Power surges, sudden power outages, and voltage fluctuations cause the thermal cutoff switch to fail. Even with surge protectors installed, these safety components can fail due to their sensitivity to electrical anomalies.
Is the BB-600 worth repairing?
Yes, if the only issue is TCO failure. The repair costs approximately $10 to $15 for the part plus the cost of a hole saw and connectors. Bio Bidet no longer sells replacement seats for BB-600, making repair the only option.
How long does Bio Bidet seat replacement take?
For experienced users, the full replacement procedure takes approximately 8 to 10 minutes. TCO replacement adds 30 to 45 minutes for cutting, installing, and sealing the access hole.
Key Takeaways for Fixing Your Bio Bidet Heated Seat
A Bio Bidet heated seat not working is often fixable, even when official support has ended. Start with Eco Mode disable and power reset, as these resolve the majority of reported issues. If those fail, the thermal cutoff switch (TCO) is likely the culprit, especially in BB-600 models. The repair requires cutting a 1.75-inch access hole and crimping a new DF91S TCO, a procedure verified by multiple users. For physical damage, heating element failure, or unavailable parts, full seat replacement using the USPA 6800 procedure restores full functionality. With the right tools and careful attention to wiring connections, you can restore comfort and extend your bidet’s life for years.