
Installing an Omigo bidet is a simple, tool-friendly upgrade that boosts bathroom hygiene without requiring electrical work. Designed for DIYers, the Omigo Element and similar models use water pressure only, making them perfect for rentals, older homes, or any toilet with standard plumbing. With just a few basic tools and this step-by-step guide, you can have your bidet up and running in under 40 minutes.
This guide covers everything you need to know about how to install Omigo bidet components safely. You’ll learn how to shut off water, install the T-valve, mount the seat, and prevent leaks while avoiding common mistakes that cause post-installation problems.
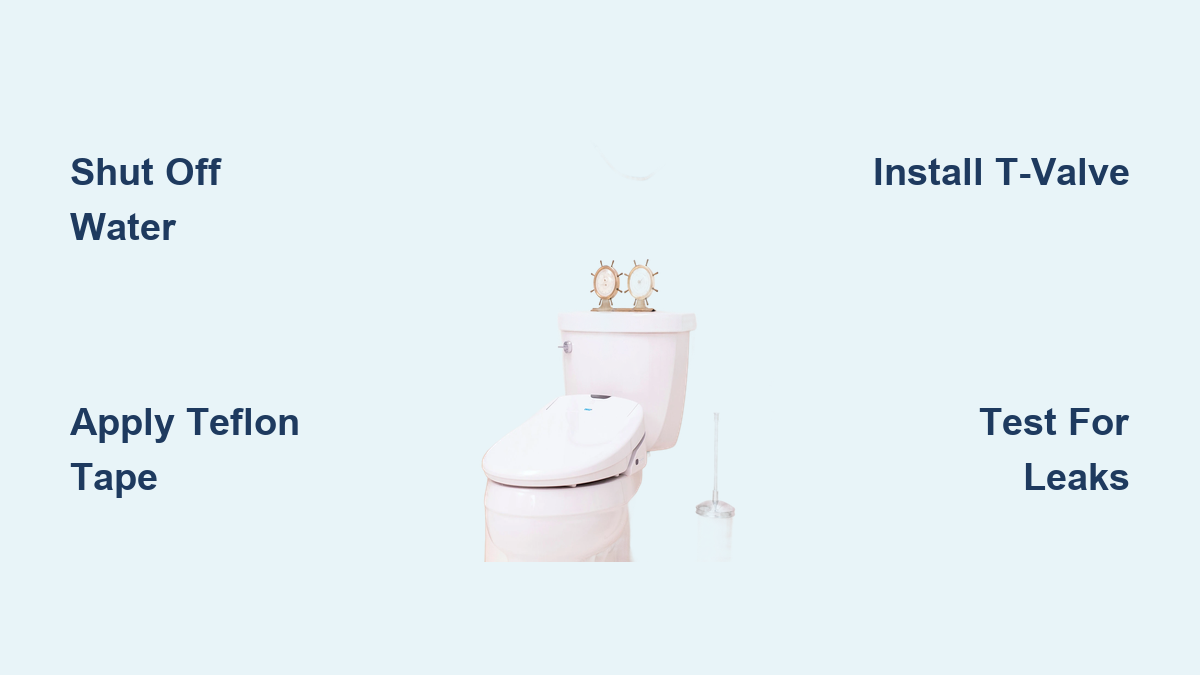
Shut Off Water Supply
Before touching any plumbing, stop the water flow to avoid spills and potential water damage to your bathroom.
Locate the Shutoff Valve
Find the round knob or lever behind your toilet near the wall or floor. This controls water going to the tank. Turn it clockwise until tight. Never skip this step because working on live water lines risks flooding your bathroom.
Drain Remaining Water
Flush the toilet to empty the tank completely. Hold the handle down to remove as much water as possible. Any leftover water will drip when you disconnect hoses, so keep a towel or small bucket nearby to catch it.
Place a rag under the valve connection. It absorbs drips and keeps the floor dry during the disassembly process.
Remove Old Toilet Seat
Clear the way for your new bidet by removing the existing seat safely and without damaging your toilet.
Pop Open Hinge Covers
Use a flathead screwdriver to gently pry off the plastic caps on the back of the seat hinges. These hide the mounting bolts. Be careful not to scratch the porcelain finish on your toilet.
Unscrew Mounting Bolts
Hold the nut underneath with your fingers or pliers to stop it from spinning. Then unscrew the top bolt using hand pressure or a wrench. Repeat on both sides to free the seat completely.
If bolts are rusted or stuck, apply penetrating oil and wait 5 to 10 minutes before trying to loosen them. Wrap pliers in cloth to avoid damaging surfaces.
Lift the old seat and lid straight off. Clean the hinge area with a disinfectant wipe before installing the new unit.
Install T-Valve on Tank

The T-valve splits water between the toilet tank and bidet nozzle. This is the core of your entire setup, so getting it right prevents leaks later.
Disconnect Supply Line
Use an adjustable wrench to loosen the nut connecting the water hose to the bottom of the tank. Turn counterclockwise to release it. Let any residual water drain into your towel or bucket before proceeding.
Look for moisture dripping from the tank outlet. Wait until it stops completely before moving to the next step.
Apply Teflon Tape
Wrap 2 to 3 layers of plumber’s tape clockwise around the threaded tank outlet. This seals the connection and prevents leaks. Don’t skip this step because over 70 percent of post-installation drips come from untaped threads.
Attach T-Valve
Screw the inlet port of the T-valve directly onto the tank’s threaded outlet. Hand-tighten first, then give it a quarter turn with pliers. Avoid over-tightening because plastic fittings can crack under too much force.
The T-valve should sit straight, not crooked. A misaligned valve can stress connections and cause leaks down the road.
Reconnect Water and Add Bidet Hose
Now restore toilet function and link the bidet’s water supply properly.
Reattach Toilet Supply Line
Connect the original water hose to the bottom port of the T-valve, which is the straight-through side. Tighten securely with a wrench. This keeps normal tank filling uninterrupted.
Connect Bidet Supply Hose
Take the included bidet hose and attach one end to the side outlet of the T-valve. Route the other end along the base of the toilet toward the back of the bowl. Connect it to the inlet valve on the bidet seat.
Keep the hose flat and unobstructed. Avoid sharp bends or kinks because they reduce water pressure and weaken the hose over time.
Mount Bidet Seat Securely
Proper alignment ensures stability, comfort, and correct function for years to come.
Align Mounting Tabs
Position the bidet base so its tabs slide into the toilet’s hinge slots. On Omigo Element models, use adjustable mounting rings to fit round or elongated bowls. Rotate them until snug against the rim.
Insert and Tighten Bolts
Insert the plastic bolts through the hinge holes from below. Hand-tighten the wing nuts or locking levers. Some models click into place with no tools required.
Over-tightening can crack porcelain or warp plastic. Stop when resistance feels firm. If wobbling occurs later, slightly retighten.
Gently shake the seat to test stability. It should not move side-to-side or front-to-back.
Restore Water and Test for Leaks

Final connections demand caution and close inspection before declaring the job done.
Turn On Water Supply
Slowly open the shutoff valve counterclockwise. Let the tank refill completely. Watch for drips at every joint as pressure builds.
Inspect All Connections
Check these points carefully for any signs of water escape.
Look for even the smallest droplet at the T-valve to tank outlet, T-valve to supply line, T-valve to bidet hose, and bidet hose to seat inlet. A slow leak may worsen under full pressure.
If water appears at any connection, shut off the valve immediately. Disconnect the fitting, reapply Teflon tape, and re-tighten. Most leaks resolve in one retry.
For extra confidence, let the installation sit for 12 hours before regular use. One verified user reported a minor drip that sealed itself after initial pressurization.
Test Bidet Functions Fully
Now verify performance with no electricity needed for non-electric models.
Activate Spray Modes
Press the rear wash button. You should feel a steady stream from the rear nozzle. Switch to front wash and confirm separate nozzle activation.
Spray should be strong but comfortable. Weak flow means low home pressure below 20 psi or a clogged filter.
Confirm Self-Cleaning Feature
After use, nozzles retract and flush automatically. Listen for a brief water burst. This is the self-cleaning cycle that prevents bacteria buildup.
Non-electric Omigo models run entirely on water pressure. No outlet within 6 feet is required, which is ideal for rental compliance.
Prevent Common Installation Mistakes
Avoid setbacks by learning these expert tips before you start.
Don’t Skip Teflon Tape
Untaped threads are the number one cause of leaks. Always wrap clockwise for proper seal. Two to three full wraps are enough to create a watertight connection.
Avoid Kinked Hoses
A bent bidet hose restricts water flow significantly. Route it smoothly along the toilet base. Never pinch it under the seat or behind fittings.
Don’t Over-Tighten Fittings
Hand-tight plus a quarter turn with tools is sufficient. Over-tightening cracks plastic T-valves or damages toilet tanks permanently.
Use finger-tight first, then fine-tune with pliers. If plastic squeaks, stop immediately because you’re about to crack it.
Maintain Your Omigo Bidet
Keep your bidet hygienic and long-lasting with simple regular care.
Clean Nozzles Monthly
Soak a soft brush in vinegar solution and gently scrub the nozzles. This removes mineral deposits and limescale. Rinse thoroughly before using the bidet again.
Wipe Seat and Controls
Use a damp cloth with mild soap. Avoid bleach or abrasive cleaners because they degrade plastic and rubber parts quickly.
Inspect Hoses Every 6 Months
Check for bulges, cracks, or dampness near connections. Replace the hose if worn. Omigo offers replacement kits through their support channels.
In freezing bathrooms, drain the hose during extended absences. Disconnect and blow out water to prevent bursting.
Troubleshoot Key Issues Fast
Fix common problems before they ruin your bathroom experience.
No Water from Bidet
Check three things first. A kinked or twisted hose blocks flow completely. The shutoff valve might be partially closed. The nozzle or internal filter could be clogged.
Straighten the hose, verify the valve is fully open, and flush the nozzle by running the bidet for 30 seconds.
Weak Spray Pressure
Omigo requires at least 20 psi of home water pressure to function properly. If other fixtures are weak, the issue is house-wide, not your bidet.
Remove the bidet hose and rinse the inline filter under tap water to restore flow.
Leaking at T-Valve
The most common cause is missing or misapplied Teflon tape. Shut off water, disconnect the fitting, re-tape threads clockwise, and reassemble. Tighten firmly but gently.
Wobbly Bidet Seat
Loose mounting bolts or misaligned tabs cause this problem. Recheck alignment, ensure tabs are fully seated, and retighten wing nuts.
Unusual Noises During Use
Air in the line creates sputtering sounds. Run the bidet for 30 seconds to purge trapped air.
If pipes bang loudly, you have water hammer. Install an anti-hammer valve on the supply line to fix it.
Know Warranty and Support Options
Stay protected after installation by understanding your coverage.
Omigo’s 1-Year Limited Warranty
The warranty covers defects in materials and workmanship. It includes free replacement for malfunctioning nozzles, leaky valves, and faulty hoses.
Register your product at omigo.com/support to activate full coverage and ensure you can claim benefits if needed.
Access 24/7 Customer Help
Need help mid-install? Omigo offers live chat support, email assistance, and installation videos with PDF guides.
Don’t guess when expert help is available free of charge. Get your questions answered fast.
Key Takeaways for Installing Your Omigo Bidet
Installing an Omigo bidet is one of the easiest bathroom upgrades you can tackle yourself. With water-powered operation, universal fit, and leak-resistant design, models like the Omigo Element deliver comfort and cleanliness without complexity.
The most important steps are shutting off water first, applying Teflon tape to every threaded connection, and testing all joints before using the bidet. Take your time on the T-valve installation because this single component prevents the leaks that most DIYers complain about later.
Follow each step in this guide, double-check every connection, and never skip the overnight leak test. In less than an hour, you’ll enjoy a fresher, more hygienic bathroom experience with no plumber required.
Frequently Asked Questions About Installing an Omigo Bidet
How long does it take to install an Omigo bidet?
Most DIYers complete installation in 20 to 40 minutes. The time depends on your plumbing experience and whether you need to remove an old seat first.
Do I need an electrician to install an Omigo bidet?
No. Non-electric models like the Omigo Element run entirely on water pressure. No electrical outlet is required within 6 feet of the toilet.
What tools do I need to install an Omigo bidet?
An adjustable wrench and flathead screwdriver are the main tools needed. Most kits include mounting hardware, Teflon tape, and the required hoses.
Why is my Omigo bidet leaking after installation?
The most common cause is missing or improperly applied Teflon tape on threaded connections. Re-tape all threads clockwise and re-tighten the fittings.
Can I install an Omigo bidet on any toilet?
Omigo bidets fit most standard round and elongated toilets. Adjustable mounting rings accommodate various toilet shapes and thicknesses.