

A leaking bidet sprayer is one of the most frustrating bathroom plumbing issues you can face. Water pooling around the base, dripping from the nozzle, or spraying in unexpected directions are all telltale signs that something has gone wrong with your bidet setup. While many homeowners immediately reach for plumber’s tape or try to tighten connections, these quick fixes often fail because they don’t address the real culprits: damaged hoses, worn washers, mineral buildup, or incompatible fittings. Understanding how to fix a leaking bidet sprayer properly saves you money on plumber visits and prevents water damage to your bathroom floor.
This comprehensive guide walks you through every possible cause of a leaking bidet sprayer and provides detailed, step-by-step solutions you can complete in under 30 minutes. Whether the leak originates at the connection point, the nozzle, or along the hose itself, you’ll learn exactly how to diagnose the problem and apply the right fix. By the end, you’ll know when DIY repair is appropriate and when it’s time to call in a professional.
Identify the Leak Source

Before you disassemble anything, you need to pinpoint exactly where the leak is coming from. Water has a tendency to travel along surfaces, so the visible drip may not be the actual source of the problem. Taking time to identify the true leak location will save you from replacing parts unnecessarily.
Connection Leaks
If water pools around the hex nut where the hose connects to the tap or sprayer base, the issue likely involves loose threading, a missing washer, or cross-threading. These connection leaks are the most common type and typically the easiest to fix. You’ll notice water appearing right at the joint within seconds of turning on the water supply.
Nozzle Dripping
When water seeps from the spray holes after you’ve finished using the sprayer, mineral buildup is usually the culprit. This type of leak occurs because sediment has accumulated inside the nozzle, preventing the internal valve from closing fully. The dripping typically happens every 10 to 15 seconds, creating a persistent annoyance.
Hose Seepage
If the hose itself appears to be sweating, bulging, or has visible soft spots, you may be dealing with micro-fractures or internal damage. A compromised hose cannot be repaired with tightening or tape. The damage may not be visible on the exterior, making this a tricky diagnosis.
T-Valve or Supply Line Leaks
Leaks appearing at the T-adapter or where the supply line meets the wall suggest cracked plastic, poor thread matching, or excessive water pressure. These locations require careful inspection and sometimes professional intervention, especially if the fittings are old or corroded.
Pro Tip: Dry all connections thoroughly, wrap tissue paper around each joint, then turn the water on slowly. The first spot to show moisture reveals the true leak source.
Fix Loose or Leaky Connections
Most connection-related leaks stem from improper assembly or worn seals. Addressing these issues typically requires nothing more than proper washer placement and correct tightening technique.
Check for Missing or Damaged Washer
Every bidet connection relies on a rubber washer or O-ring to create a watertight seal, not thread tape. Remove the hose and inspect both ends carefully. Look for a black rubber O-ring inside the female connector and ensure it isn’t flattened, cracked, or completely missing. Many bidet kits come with pre-installed washers hidden under blue protective caps that must be removed before installation. Failing to remove these caps is one of the most common installation mistakes that leads to immediate leaking.
Avoid Cross-Threading
Starting threads at an angle can strip fittings, especially on plastic components. Always begin threading by hand and ensure the connection turns smoothly for at least three to four complete turns. If the fitting binds early, back off completely and restart the threading process. Forcing a misaligned fitting will destroy the threads and create a leak that no amount of tightening can fix.
Warning: Never use a wrench until the fitting is fully hand-tight. Forcing a cross-threaded connection can crack the T-valle or toilet tank inlet, turning a simple $10 repair into a costly plumbing job.
Don’t Overtighten
Overtightening is a leading cause of cracked plastic nuts and damaged threads. After hand-tightening a connection, use a spanner for only a quarter to half turn additional. That minimal amount of torque is all it takes to create a proper seal with a correctly seated washer. Excessive force crushes washers, deforms O-rings, and can crack the fitting itself.
Replace the Bidet Hose
If the hose is cracked, bulging, or leaking along its length, replacement is your only option. Attempting to repair a damaged hose with tape or clamps rarely works and often fails within days.
Choose the Right Replacement
Select a replacement hose that matches your current thread type, commonly 3/8 inch compression or 7/8 inch toilet tank thread. Confirm the angle required for your setup: a 45-degree hose fits angled ports while a 90-degree hose works with straight ports. Investing in a braided stainless steel hose provides superior durability and typically lasts three to five times longer than plastic alternatives.
Install the New Hose
Start by shutting off the water at the local shutoff valve. Relieve remaining pressure by flushing the toilet or triggering the sprayer. Remove the old hose with an adjustable wrench, then attach the new hose by hand-tightening the hex end to the tap. Use a spanner for one gentle turn past hand-tight, then connect the sprayer to the round head. Turn the water back on slowly and test for leaks. A successful repair shows no drips after five minutes of use.
Cost-Saving Tip: A new hose costs approximately $10, compared to $60 or more for a plumber service call.
Clean a Dripping Nozzle
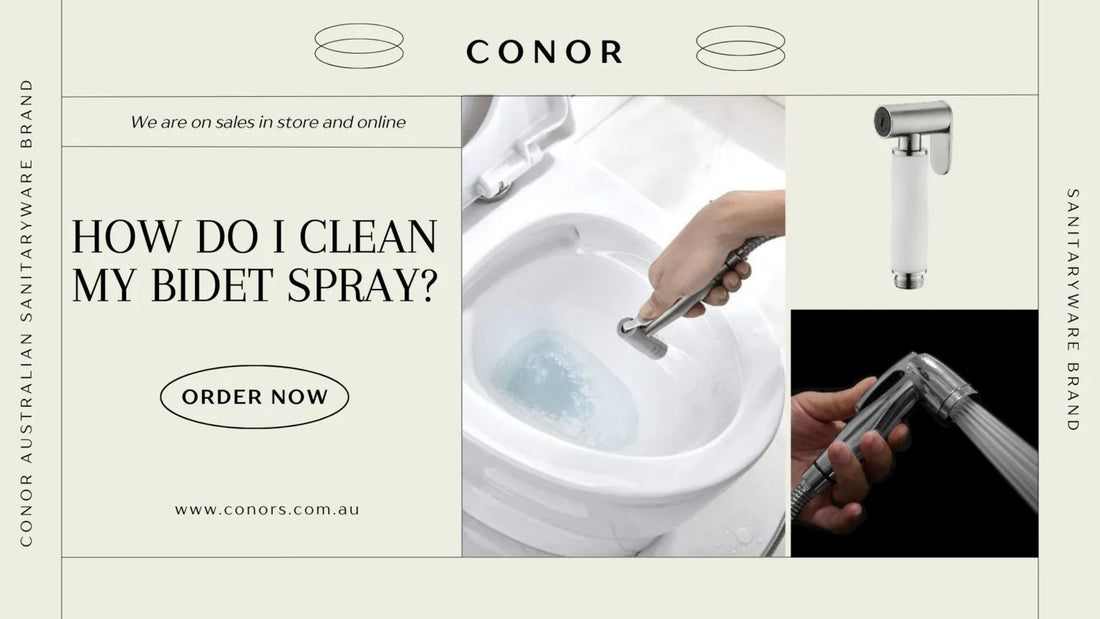
Water dripping from the nozzle tip every 10 to 15 seconds usually indicates mineral deposits blocking the internal valve. This isn’t a seal problem but a clog that prevents proper closure.
Soak in Vinegar
Unscrew the sprayer head from the hose and submerge the nozzle in white vinegar for 30 to 60 minutes. Use a thick needle to poke through each spray hole and dislodge accumulated debris. Rinse thoroughly with room-temperature water, never hot water, which can warp plastic components.
User Confirmation: Multiple DIYers report that a vinegar soak completely resolved their nozzle dripping issues.
Deep Clean Internal Components
For stubborn mineral buildup that soaking alone won’t fix, disassemble the sprayer housing using a small Phillips screwdriver. Soak all internal parts in a CLR solution or a vinegar-dish soap mixture for 15 to 30 minutes, then rinse thoroughly and reassemble carefully.
Test and Fix High Water Pressure
If leaks persist despite replacing hoses and ensuring proper tightening, water pressure exceeding 80 PSI may be the underlying cause. High pressure forces water past otherwise functional seals and accelerates wear on washers, O-rings, and hoses.
Measure Your Pressure
Purchase a water pressure gauge for $10 to $15 and attach it to an outdoor spigot or washing machine valve. Turn the valve fully and read the PSI. The ideal range falls between 40 and 60 PSI, with 60 to 80 PSI being acceptable though worth monitoring. Anything above 80 PSI puts your bidet components at serious risk.
Install a Pressure Reducing Valve
If your home lacks a pressure reducing valve near the main water line, consider having a plumber install one. This protects not just your bidet but all plumbing fixtures throughout the house. Until pressure is corrected, replacing washers and hoses repeatedly will provide only temporary solutions.
Pro Tip: Always shut off the bidet’s shutoff valve when leaving for extended periods. This reduces wear on components and prevents potential flooding while you’re away.
Upgrade Washers and Fittings
Stock washers that come with bidet kits are often thin and made from low-quality rubber that degrades quickly under normal water pressure. Upgrading to superior components provides a more reliable, long-lasting seal.
Use High-Quality Washers
Replace standard washers with thicker blue Showy washers or reinforced rubber versions available at plumbing supply stores or online. Install upgraded washers on both the T-valve and hose connections for the best sealing performance. Multiple users report this simple change completely eliminated their leaking issues.
Replace Plastic Supply Lines
Old plastic supply lines become brittle over time and crack under normal use. Upgrade to braided stainless steel lines for significantly better durability. This upgrade costs between $20 and $40 but provides years of reliable service compared to repeated failures with plastic.
Avoid Common DIY Mistakes
Even experienced DIYers make critical errors that cause or worsen leaks. Understanding what not to do is just as important as knowing the correct repair steps.
Don’t Use Plumber’s Tape on Compression Fittings
Compression fittings, which have rubber washers inside, do not require and should not receive plumber’s tape. Applying tape to these connections prevents proper seating of the washer and actually causes leaks. Use tape only on pipe-thread joints that have no washer. The simple rule is: washer present means no tape, no washer means two to three wraps of PTFE tape.
Don’t Ignore Clearance Issues
If your toilet sits less than 2 inches from the wall, the T-valve may not seat properly, creating angular stress that leads to leaks. Use a 90-degree elbow fitting or short extension adapter to align connections correctly. Failing to address clearance issues guarantees recurring problems regardless of how well you repair other components.
When to Call a Plumber
Some issues are beyond safe DIY repair and require professional intervention. Calling a plumber is the right choice when the toilet tank inlet or shutoff valve is cracked, the shutoff valve doesn’t fully stop water flow, there’s no local shutoff valve requiring main water shutdown, leaks are hidden behind walls or under flooring, or sealing surfaces are corroded or damaged by mineral buildup.
Critical Advice: If you’re uncertain about any aspect of the repair or lack proper access to components, call a plumber. Fixing a $10 hose is straightforward. Repairing a flooded bathroom is not.
Prevent Future Leaks
A small amount of regular maintenance prevents most bidet sprayer leaks and extends the life of your components significantly.
Annual Maintenance Checklist
Inspect washers for wear at least once per year. Clean the nozzle with vinegar every six months to prevent mineral accumulation. Check water pressure annually, especially in older homes. Replace hoses every three to five years even if no visible damage exists. Flush the system regularly to clear sediment from internal passages.
Smart Upgrades
Install a wall-mounted shutoff valve if none exists, making future repairs much easier. Use filtered water in hard water areas to dramatically reduce mineral buildup. Label hoses during any disassembly so you can correctly route 45-degree and 90-degree fittings during reassembly.
Repair vs. Replace Decision Guide
| Condition | Recommended Action |
|---|---|
| Loose connection or worn washer | Repair yourself |
| Damaged or bulging hose | Replace the hose |
| Nozzle dripping after use | Clean with vinegar |
| Repeated leaks after fixes | Check water pressure |
| Cracked T-valve or supply nut | Replace with braided steel |
| No shutoff valve or hidden leak | Call a plumber |
| Water pressure above 80 PSI | Fix pressure before replacing parts |
Frequently Asked Questions About Fixing a Leaking Bidet Sprayer
Why is my bidet sprayer leaking even after I tightened the connections?
Tightening alone cannot fix leaks caused by missing washers, damaged hoses, or mineral-clogged nozzles. If tightening doesn’t resolve the leak within one quarter-turn past hand-tight, stop and investigate the actual cause. Over-tightening risks cracking plastic fittings.
Can I use plumber’s tape to stop a leaking bidet sprayer?
Plumber’s tape only works on pipe-thread joints without washers. Most bidet connections use compression fittings with rubber washers, so tape will not help and may actually prevent proper sealing. Using tape on compression fittings often makes leaks worse.
How do I stop my bidet nozzle from dripping after use?
Dripping nozzles are usually caused by mineral deposits preventing the internal valve from closing fully. Remove the sprayer head, soak it in white vinegar for 30 to 60 minutes, then use a thick needle to clear each spray hole. Rinse with room-temperature water and reinstall.
How often should I replace my bidet hose?
Replace bidet hoses every three to five years, even if they appear undamaged. Internal deterioration can occur without visible external signs. Braided stainless steel hoses last longer than plastic ones and provide better protection against sudden failures.
What water pressure is safe for bidet sprayers?
The ideal water pressure for bidet sprayers is 40 to 60 PSI. Pressures between 60 and 80 PSI are acceptable but should be monitored. Anything above 80 PSI risks damaging seals and components, and you should address high pressure before replacing any parts.
Key Takeaways for Fixing Your Leaking Bidet Sprayer
Fixing a leaking bidet spreyer is usually a quick, inexpensive DIY project that saves you $60 or more compared to hiring a plumber. The most common causes are damaged hoses, missing or worn washers, mineral-clogged nozzles, and improper installation technique. Always start by identifying the exact leak source using the tissue paper test, then address the specific component causing the problem. Never overtighten connections, as this cracks plastic fittings and creates leaks worse than the original problem. Upgrade to thicker washers and braided stainless steel hoses for long-term reliability, and clean the nozzle twice yearly with vinegar to prevent mineral buildup. If your water pressure exceeds 80 PSI, address that issue first before replacing any components. With proper diagnosis and the right parts, your bidet sprayer will operate drip-free for years.