

Is your bidet spray head cracked, leaking, or just not spraying right? You are not alone. Millions of homeowners and renters replace their bidet spray heads every year to restore hygiene functionality, improve water control, or eliminate annoying drips. The good news: changing a bidet spray head is a simple DIY task that takes under 30 minutes and requires no plumbing expertise. Whether you are replacing just the head or upgrading the whole system, this guide walks you through every step safely, efficiently, and without leaks.
You will learn how to identify compatible parts, remove the old spray head, install a new one correctly, and prevent common mistakes like over-tightening or forgetting the rubber washer. We will also show you when to replace just the head versus the entire hose and valve system so you save time and money.
Replace Spray Head Only
If your hose is in good condition with no kinks, cracks, or leaks, you can replace just the spray head. This is the fastest and most cost-effective fix.
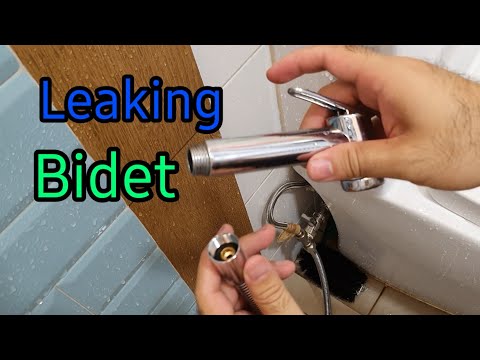
Confirm Hose Compatibility
Most bidet spray heads use a standard ½-inch male threaded connector. Check that your existing hose has a ½-inch female thread at the end. If it does, nearly any replacement head will fit.
When shopping for a replacement, consider these options:
- Plastic heads: Budget-friendly, typically $5 to $15, but may wear faster
- Chrome or stainless steel: Durable and corrosion-resistant, typically $20 to $50
- Dual-spray models: Offer both jet and mist settings for better control
Take a photo of your current spray head before buying a replacement. Compare thread size and shape online to ensure compatibility.
Remove Old Spray Head
Follow these steps to safely remove your old spray head:
- Turn off the water supply behind the toilet by turning the valve clockwise
- Flush the toilet to drain residual water from the line
- Unscrew the old head from the hose by hand. If stuck, use a wrench with a cloth to avoid scratching
- Inspect the hose end for cracks, mineral buildup, or damaged threads
If the hose end is corroded or stripped, replace the entire hose. Forcing a new head onto a damaged connection causes leaks.
Install New Spray Head
Follow these steps for a leak-free installation:
- Hand-tighten the new head onto the hose. Do not use tools because over-tightening damages plastic threads
- Ensure the rubber washer inside the hose end is intact before connecting
- Position the sprayer lever 45 degrees toward the wall so it clears the toilet seat when lifted
- Turn water back on slowly and test for leaks
If water seeps from the connection, slightly tighten by hand. Never use plumber’s tape because rubber washers provide the seal.
Upgrade Full Bidet System
If your hose is cracked, kinked, or leaking, or if the T-valve is corroded, replace the entire system. A full kit includes the spray head, hose, T-valve, and holder.
Gather Replacement Kit Parts
A standard bidet sprayer kit includes these components:
- Spray head with ergonomic handle and lever-activated flow
- 4-foot braided stainless steel hose that is kink-resistant
- T-valve that diverts water to both tank and sprayer
- Rubber washers, typically two to three, which are critical for leak-free seals
- Mounting holder, either tank clip or wall bracket
Buying a complete kit is often cheaper than buying parts separately and ensures compatibility.
Shut Off Water and Drain Line
- Turn off the shut-off valve behind the toilet
- Flush the toilet to empty most water from the line
- Place a towel under the connection point to catch drips
Residual water, about a quarter inch, is normal and no need to fully dry the line.
Install T-Valve Correctly

The T-valve splits water flow between the toilet tank and bidet hose. Installing it wrong causes low pressure or leaks.
Remove Existing Hose
- Unscrew the water supply hose from the bottom of the toilet tank
- Keep the rubber washer if it is in good condition
Attach T-Valve to Tank Inlet
- Insert a rubber washer into the top port of the T-valve
- Hand-tighten the T-valve onto the toilet tank inlet thread. Do not use a wrench because plastic fittings crack easily
- Orient the T-valve so the side outlet faces toward the bidet hose path. Loosen the tank’s wing nut if needed to rotate the valve
Reconnect Toilet Hose to Bottom Outlet
- Attach the original or new hose from the wall supply to the bottom outlet of the T-valve
- Hand-tighten only, no tools needed
The T-valve should stand vertically with one port up to the tank, one down from the wall, and one side-facing to the bidet.
Connect Hose and Mount Sprayer
Now install the new hose and secure the spray head in place.
Attach Hose to T-Valve
- Remove the protective cap from the hose end
- Confirm the rubber washer is inside the threaded fitting
- Screw the hose onto the side outlet of the T-valve
- Hand-tighten securely, no leaks, no tools
Install Bidet Holder
Choose based on your bathroom setup:
Tank-Mount Holder
- Clips onto the toilet tank
- No drilling required, ideal for renters
- Check stability to ensure it does not wobble during use
Wall-Mount Holder
- Mark drill points on the wall behind the toilet
- Install plastic anchors, then screw in the bracket
- More durable and keeps the hose off the floor
Position the holder so the spray head is easy to grab but out of the splash zone.
Connect Spray Head to Hose
- Screw the spray head onto the free end of the hose
- Hand-tighten only, do not use pliers
- Set the lever at a 45-degree angle toward the wall for smooth access
Test for Leaks and Adjust Flow
Now turn the water back on and verify everything works correctly.
Turn On Water Supply
- Slowly open the shut-off valve
- Watch all connections including the T-valve top and side, hose ends, and toilet tank inlet
If leaking occurs, slightly tighten by hand. If it persists, recheck the rubber washers.
Adjust T-Valve for Optimal Flow
The T-valve controls how much water goes to the bidet:
- Lever fully up gives maximum bidet flow but may cause dripping
- Lever fully down provides no bidet flow, only the tank fills
- Recommended setting is approximately 20 percent up, enough pressure for cleaning without drip
User-tested settings show that 20 percent flow balances comfort and leak prevention effectively.
Test Spray Function
- Pull the lever gently, it should release a steady stream
- Check spray modes if your model is dual-function. Press the side button to switch between jet and mist
- Verify the self-stop feature, spray should stop when the lever is released
If there is no spray, clean the nozzle with a vinegar soak because mineral buildup is the usual culprit.
Troubleshoot Common Problems
Even with correct installation, issues can arise. Here is how to fix them fast.
Fix Leaking Connections
| Leak Location | Likely Cause | Solution |
|---|---|---|
| T-valve inlet | Missing washer | Insert rubber washer |
| Hose end | Overtightened or damaged thread | Replace hose |
| Spray head | Loose connection | Hand-tighten, do not use tools |
Rubber washers, not thread tightness, prevent leaks. Never skip them.
Restore Low Water Pressure
Common causes include a partially closed T-valve, clogged nozzle, or kinked hose.
Fixes:
- Open the T-valve lever higher, up to 50 percent if needed
- Soak the spray head in white vinegar for 30 minutes to dissolve lime buildup
- Replace the hose if it is kinked or bulging
Use a toothbrush to scrub tiny nozzle holes after soaking for best results.
Replace Worn Spray Head Mechanism
If the sprayer will not lock in continuous spray, drips after release, or feels stiff or sticky, the internal valve is worn. Replace the spray head because it is not repairable.
Budget heads typically last 1 to 3 years while premium stainless models can exceed 10 years.
Choose the Right Replacement
Not all bidet heads are equal. Pick the best one for your needs and budget.
Budget vs. Premium Models
| Feature | Budget ($5–$15) | Premium ($25–$50) |
|---|---|---|
| Material | Plastic | Stainless steel |
| Spray Modes | Single jet | Dual (jet + mist) |
| Durability | 1–3 years | 5–10+ years |
| Self-cleaning | No | Some models include |
| Hose | Reinforced rubber | Braided stainless steel |
Mid-range models at $20 to $35 offer the best value with smooth trigger, better seal, and 5-year lifespan.
Where to Buy
You can find replacement parts at:
- Amazon, Home Depot, Lowe’s, Shopee, and Lazada
- Plumbing supply stores where helpful staff can check compatibility
Search for handheld bidet sprayer kit to find complete sets with hose, valve, and holder included.
Maintain Long-Term Performance
A well-maintained bidet system can last decades. Follow these habits to extend its life.
Clean Nozzle Monthly
- Unscrew the spray head
- Soak in vinegar for 30 minutes
- Use a toothpick or brush to clear holes
- Reinstall and test
In hard water areas, clean every 1 to 2 months.
Inspect Hose and Valve Annually
Look for these warning signs:
- Cracks or bulges in the hose
- Corrosion on metal parts
- Stiff T-valve lever
Replace any damaged component immediately.
Replace Rubber Washers Proactively
Washers degrade over time. Replace every 3 to 5 years or if you notice tiny drips at connections or constantly need to re-tighten fittings.
Frequently Asked Questions About Changing Bidet Spray Head
Can I replace just the spray head without changing the hose?
Yes, you can replace only the spray head if the hose is in good condition with no cracks, kinks, or leaks. Simply unscrew the old head and attach a new one with the same thread size, typically ½-inch.
How do I know if my bidet spray head needs replacement?
Replace the spray head if you notice cracks in the nozzle, consistent leaking at the connection, reduced water pressure, or if the lever no longer controls flow properly. A worn internal mechanism cannot be repaired and requires replacement.
What tools do I need to change a bidet spray head?
You typically need no tools because hand-tightening is sufficient. However, keep a cloth and adjustable wrench nearby in case the old head is stuck. Never use pliers on plastic threads.
Why is my new spray head leaking after installation?
Leaking usually means the rubber washer is missing, damaged, or not seated properly. Remove the head and check the washer inside the hose end. Also ensure you are hand-tightening only because over-tightening damages threads.
How long does a bidet spray head last?
Budget plastic heads last 1 to 3 years while mid-range models last about 5 years. Premium stainless steel heads can last 10 years or more with proper care and regular cleaning.
Can I install a bidet spray head myself or do I need a plumber?
You can install it yourself in under 30 minutes. The process requires no plumbing expertise, only basic hand-tightening of connections and turning off the water supply. Most homeowners complete this as a DIY project.
Key Takeaways for Changing Your Bidet Spray Head
Changing a bidet spray head is one of the easiest and most impactful bathroom upgrades you can make. Whether you replace just the head or the entire system, the process is tool-free, affordable, and takes less than 30 minutes. Focus on hand-tightening with intact rubber washers, set the T-valve to 20 percent flow, and choose a wall-mounted holder for long-term durability. With proper care, your new bidet can last 5 to 10 years or more. Now you are ready to enjoy a cleaner, more hygienic bathroom experience without calling a plumber.