
You’ve decided to upgrade your bathroom hygiene. Learning how to hook up a bidet is easier than you think. Whether you’re installing a sleek electric seat, a simple cold-water attachment, or a flexible handheld sprayer, 95% of bidets can be installed in under an hour with basic tools, no plumber needed.
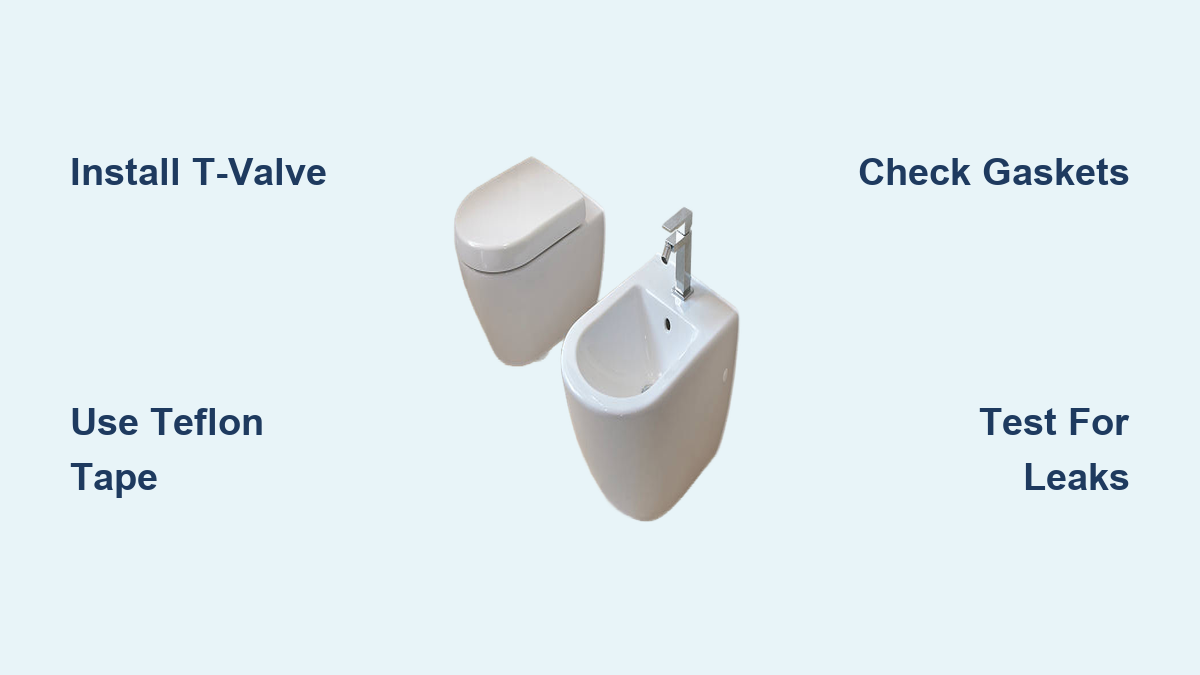
The core of every bidet installation is the T-valve, a small fitting that splits your toilet’s existing water supply between the tank and the bidet. This means no new plumbing, no major modifications, and full reversibility, perfect for homeowners and renters alike.
Choose Your Bidet Type First
Before picking up a wrench, decide which bidet suits your needs. Each type installs differently and offers unique benefits.
Bidet Toilet Seats
These replace your existing toilet seat and offer the most comfort. Heated water, warm air drying, self-cleaning nozzles, and even remote controls are available. Brands like Toto and Bio Bidet dominate this category.
Key requirements include:
• GFCI electrical outlet within 3 feet
• Uses T-valve for water connection
• Installation time: 30 to 60 minutes
• Best for permanent setups and comfort seekers
Bidet Attachments
These clip under your current seat and provide cold-water spray only with manual control. They cost between $30 and $80 and install in 10 to 20 minutes. No electricity is needed, making them ideal for first-timers, renters, and budget buyers.
Pro Tip: Models like the Modra Button take less than 5 minutes with no tools required.
Handheld Bidet Sprayers
Mounted on the wall or tank, these work like a kitchen sprayer. They offer full directional control and are ideal for mobility issues, post-surgery care, or shared bathrooms. They connect via T-valve and come with durable metal hoses.
Real-World Use: The Luxe Neo 120 is a top-rated handheld that installs with included tools and takes under an hour.
Gather Tools and Parts
You do not need a full toolbox. Most bidets come with everything you need. Just double-check before starting.
Essential Tools
• Adjustable wrench or channel-lock pliers
• Teflon plumber’s tape
• Small towel or bucket for drips
• Disinfectant wipes
• Wing-nut tool included with some sprayers
Key Components Usually Included
• T-valve that splits water flow
• Flexible supply hose connecting T-valve to bidet
• Rubber gaskets preventing leaks
• Owner’s manual with model-specific diagrams
Warning: Never skip the rubber gaskets. One Reddit user had a persistent drip for weeks. The problem turned out to be a missing internal gasket, not the tape.
Shut Off Water and Prep the Toilet
This step is critical for a dry, safe installation.
- Turn off the water supply valve behind the toilet by turning clockwise.
- Flush the toilet to empty the tank and relieve pressure.
- Hold the handle down until no more water flows.
- Disconnect the supply hose from the bottom of the tank.
- Place a towel or small bucket underneath to catch residual drips.
Check: After flushing, if the tank refills, your shut-off valve is not fully closed. Tighten it until it stops.
- Remove the old toilet seat by unscrewing the two rear bolts. Save the hardware for reuse.
- Clean the mounting area with disinfectant wipes. A clean surface ensures proper sealing and hygiene.
Install the T-Valve Correctly

The T-valve is the heart of your bidet setup. Install it wrong and you will get leaks or low pressure.
Correct Order: Water Path Explained
The proper sequence is wall pipe → shut-off valve → T-valve → toilet hose + bidet hose. This ensures both the toilet and bidet get water without backflow.
Step-by-Step T-Valve Setup
- Screw the base of the T-valve onto the fill valve where the tank hose was connected.
- Reconnect the toilet’s supply hose to the top outlet of the T-valve.
- Attach the bidet’s hose to the side outlet.
- Apply 4 to 5 wraps of Teflon tape to all male threads.
- Insert rubber gaskets into each connection point. This is non-negotiable for leak prevention.
- Hand-tighten first, then use a wrench for a quarter-turn extra. Do not overtighten.
Critical: Point the side outlet forward toward the front of the toilet. If it faces sideways or back, the hose will kink or strain.
Mount Your Bidet Type
Now install the actual bidet based on your model.
For Bidet Toilet Seats
- Attach the mounting plate over the toilet’s bolt holes.
- Reinsert the original bolts through the plate.
- Slide the bidet seat onto the plate until it clicks.
- Press firmly if it does not lock. Clean tracks if debris is blocking it.
- Connect the hose to the bidet’s inlet, usually on the right side.
Note: If the lid hits the bidet on a one-piece toilet, choose a low-profile or curved design.
For Bidet Attachments
- Slide the attachment over the bolt holes.
- Reinstall the original seat on top.
- Tighten bolts to secure both seat and attachment.
- Connect the hose from the T-valve to the attachment.
Modra Tip: Its tool-free click-in system takes under 5 minutes, ideal for renters.
For Handheld Sprayers
- Connect the sprayer hose to the T-valve’s side outlet.
- Mount the holder on the wall or tank using an adhesive pad for renter-friendly installation, or screw into tile for permanent setup.
- Hang the sprayer in the holder when not in use.
Design Note: The sprayer may sit higher than the tank lid. This is normal and does not affect function.
Turn Water Back On and Test for Leaks
This is the moment of truth.
- Slowly turn the water supply back on. Fast opening can shock the system and cause leaks.
- Watch the T-valve, hose connections, and tank base for drips.
- Let the tank fill completely.
- Flush once to check for stability.
If you see a leak:
• Turn off water immediately.
• Check for missing gasket, insufficient tape, or overtightening.
• Reapply tape and gasket, then re-tighten gently.
- Test the bidet function. Turn the knob slowly for attachments, squeeze the trigger at low pressure for sprayers, or power on and test spray for electric seats.
Pro Tip: Start with low pressure to avoid splashing or hose strain.
Electric Bidet Safety
If you are installing a heated seat, electricity is involved. Safety first.
Must-Have: Grounded GFCI Outlet
GFCI cuts power if moisture is detected, critical near water. The outlet should be within 3 feet of the toilet but not behind it, which is hard to access. Never use an extension cord.
Code Note: National Electrical Code requires GFCI protection in bathrooms.
What If You Do Not Have an Outlet?
Hire an electrician to install one for $150 to $200, or choose a non-electric model with cold water only.
Avoid These 5 Common Mistakes
Even experienced DIYers make these errors. Do not let them ruin your install.
1. T-Valve Outlet Facing the Wrong Way
Problem: Hose kinks, sprayer misaligns.
Fix: Always point the side outlet forward.
2. Skipping Rubber Gaskets
Problem: Leaks that Teflon tape cannot fix.
Fix: Check every fitting. Gasket plus tape is the gold standard.
3. Over-Tightening Plastic Fittings
Problem: Cracked T-valve or stripped threads.
Fix: Hand-tighten first, wrench only for a final quarter-turn.
4. Ignoring Toilet Stability
Problem: Bidet shifts during use.
Fix: Ensure the toilet is bolted securely to the floor.
5. No Leak Test
Problem: Water damage, mold, warped flooring.
Fix: Monitor for at least 5 minutes after turn-on.
Troubleshoot Common Issues

No Water or Low Pressure
Check: Is the T-valve fully open?
Inspect: Is the hose kinked or coiled?
Clean: Soak nozzle in vinegar if mineral buildup is blocking flow.
Leaking at the T-Valve
Most likely cause: Missing or damaged gasket.
Solution: Disassemble, insert new gasket, reapply tape, re-tighten.
Bidet Seat Will Not Lock
Cause: Misalignment or debris in track.
Fix: Remove, clean mounting rails, realign, and press firmly until it clicks.
Sprayer Trigger Stiff or Stuck
Cause: Debris in valve or low water pressure.
Fix: Flush system, clean filter if present, check hose for kinks.
Maintain Your Bidet for Long Life
A well-maintained bidet lasts 3 to 7 years or longer. Follow these steps.
Monthly
• Clean nozzles with vinegar or soft brush
• Wipe down seat and controls with disinfectant
Every 6 Months
• Inspect hoses and connections for cracks or leaks
• Replace rubber gaskets if stiff or cracked
In Hard Water Areas
• Soak nozzle in vinegar weekly to prevent clogging
• Consider a water filter for electric models
Final Checklist: Did You Get It Right?
Verify each item:
• Water supply off before starting
• Tank drained and dry
• Old seat removed and hardware saved
• Mounting area cleaned
• T-valve installed with outlet facing forward
• Teflon tape 4 to 5 wraps on all threads
• Rubber gaskets in every fitting
• Bidet securely mounted, no wobble
• Hoses connected, no kinks
• All joints hand-tightened, not forced
• Water restored slowly, no leaks
• Bidet tested at low pressure
• Electric models plugged into GFCI outlet
Is a Bidet Worth It?
Absolutely. Users report better hygiene than wiping alone, reduced toilet paper use saving $100 or more per year, eco-friendly benefits with less waste, and improved comfort for hemorrhoids, mobility issues, or postpartum recovery.
Even basic models like Tushy or Modra deliver noticeable benefits. If you change your mind, remove it in minutes with no damage and no trace.
Final Thoughts on Hooking Up a Bidet
Hooking up a bidet is one of the easiest, most impactful bathroom upgrades you can make. With just a T-valve, a few tools, and 30 minutes, you will gain superior cleanliness and long-term savings.
Whether you choose a cold-water attachment for $40 or a luxury heated seat for $600, the installation process is nearly identical, and you can do it yourself.
Just remember:
• Tape plus gasket equals no leaks
• T-valve outlet faces forward
• GFCI for electric models
• Test before you trust
Once installed, your bidet will deliver years of comfort, hygiene, and sustainability, proving that sometimes the best upgrades are the simplest.
Frequently Asked Questions About Hooking Up a Bidet
Can I install a bidet on any toilet?
Most standard two-piece toilets are compatible. One-piece, corner, and French curve toilets may have fitment issues. Check dimensions before purchasing.
Do I need a plumber to install a bidet?
No. About 95% of bidet seats and attachments are designed for DIY installation. Only complex built-in or heated models may require professional help.
Is a bidet worth the investment?
Yes. Users report better hygiene, reduced toilet paper use, and enhanced comfort. Even basic models offer noticeable benefits that justify the cost.
Should I start with a basic or advanced bidet?
Beginners should start with a bidet attachment costing $30 to $60. Those wanting luxury features should choose an electric seat with heated water, heated seat, and air dryer.
Can I remove a bidet later?
Yes. Most models can be removed in minutes, restoring the original setup with no damage. This makes bidets perfect for renters.
Does a bidet need electricity to work?
Non-electric models use cold water only and need no power. Electric models require a grounded outlet for heated water, drying, and controls.