

Installing a bidet toilet seat is one of the simplest bathroom upgrades you can tackle as a DIY project. Most installations take under 30 minutes with basic tools, and the process follows a consistent pattern whether you choose a basic cold-water attachment or a premium electric model with heated water and air drying. This guide covers everything from shutting off your water supply to testing all spray functions, so you can complete the installation confidently and start enjoying better hygiene right away.
You’ll learn how to verify toilet compatibility, install the T-valve correctly, mount the bidet securely, and avoid common mistakes like leaks and electrical hazards. Each section includes step-by-step instructions with time estimates and pro tips to help you work efficiently.
Shut Off Water and Drain the Toilet Tank
Before touching any plumbing, stop the water flow to prevent messes and flooding during the installation process.
Turn Off the Water Supply
Locate the water shutoff valve behind your toilet, typically mounted on the wall or floor. Turn the valve clockwise until it stops completely. This cuts off water to the tank and prevents uncontrolled spraying when you disconnect hoses. Skipping this step risks water damage to your bathroom floor and belongings.
Drain Remaining Water From the Tank
Flush the toilet and hold the lever down to empty as much water as possible. Use a sponge or absorbent towel to wipe out any remaining water in the tank. A dry tank gives you a clean workspace and minimizes spills when disconnecting water lines. Place a small bucket or towel beneath the supply line connection point to catch any drips.
Remove the Existing Toilet Seat
Clear the way for your new bidet by safely removing the current seat and hardware.
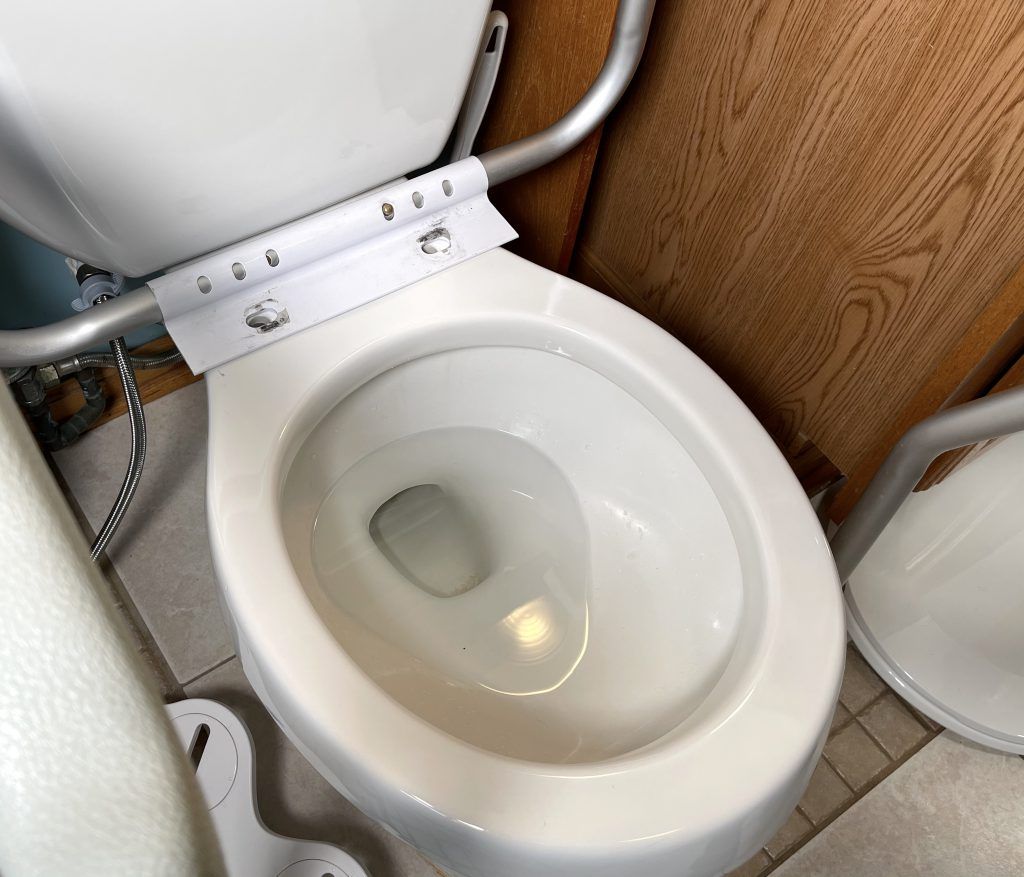
Expose and Remove the Mounting Bolts
Most toilet seats have snap-on or slide-up hinge caps covering the mounting bolts. Lift or slide these caps off to expose the bolts underneath. Use a Phillips-head screwdriver to remove the nuts and washers from the bolts protruding beneath the rim. Set aside all hardware—some bidet models can reuse these bolts.
Clean the Mounting Area
Wipe the hinge area with bathroom cleaner and a clean cloth to remove grime and buildup. A clean surface ensures proper adhesion and helps rubber gaskets seal correctly. This step also prevents bacteria from being trapped under your new bidet seat.
Confirm Your Toilet Is Compatible

Not all bidets fit all toilets. Verify shape, clearance, and power requirements before purchasing or installing.
Match Round or Elongated Bowl Shapes
Bidet seats are designed specifically for round or elongated toilet bowls. Measure from the center of the mounting bolts to the front edge of the bowl. Round toilets measure approximately 16.5 inches, while elongated toilets measure approximately 18.5 inches. Choose a bidet that matches your bowl shape to ensure proper fit and alignment.
Check Electrical Requirements for Electric Models
Electric bidets need power for heated water, seat warming, and drying features. You must plug into a GFCI (Ground Fault Circuit Interrupter) outlet, which is required by electrical code in bathrooms. Standard power cords measure 3.5 to 4 feet long. If no GFCI outlet is nearby, either install one with a licensed electrician or choose a non-electric bidet model.
Verify Nozzle Clearance
The bidet nozzle must extend and retract freely without obstruction. Avoid toilets with concave seats or lip edges that push the bidet forward and block nozzle movement. Use a flat-bottom seat for unobstructed spray coverage.
Gather Required Tools and Parts
Having everything ready before starting speeds up the installation significantly.
Essential Tools Checklist
You will need a Phillips-head screwdriver for hinge caps and bolts, an adjustable wrench or pliers for water connections, a small bucket or towel to catch drips, Teflon plumber’s tape for sealing threaded joints, and bathroom cleaner with a cloth for cleaning the mounting surface.
Components Included in Your Bidet Kit
Most bidet kits include a T-valve that splits water flow between the tank and bidet, two flexible hoses (short for the tank, long for the bidet), mounting hardware like bolts nuts washers and rubber grommets, the bidet unit itself, self-adhesive rubber cleats for stabilizing riser setups, and wing nuts for multi-layer installations.
Install the T-Valve

This small fitting divides your water supply to serve both the toilet and the bidet simultaneously.
Apply Teflon Tape and Prepare the Valve
Wrap 4 to 5 turns of Teflon tape clockwise around the shutoff valve threads to create a watertight seal. Slide a coned rubber washer (included in your kit) onto the T-valve before attaching it.
Attach the T-Valve to the Shutoff
Screw the bottom port of the T-valve onto the shutoff valve by hand. Tighten with a wrench for a quarter to half turn. Never overtighten plastic fittings, as they may crack or strip under excessive pressure.
Reconnect Water Supply Lines
Reattach the original supply line to the bottom port of the T-valve (this feeds the toilet tank). Connect the short hose from the kit to the top port if you’re replacing the original line. Attach the long hose to the side outlet (this feeds the bidet). Hand-tighten all connections first, then give each a quarter to half turn with pliers. Always use the rubber washers included in each fitting to prevent leaks.
Mount the Bidet Hardware
Secure the bracket or mounting plate that holds the bidet in place on your toilet.
Position the Mounting Bracket
Slide the mounting plate or bracket over the toilet’s existing bolt holes. For adjustable models, slide forward or backward to match your specific bowl shape. Some kits include a paper template—use it to verify correct positioning before tightening anything.
Secure the Bolts
Insert mounting bolts through the bracket and into the bowl holes. Fasten from underneath using plastic nuts, wing nuts, or tightening screws depending on your model. Some models use rubber grommets instead of nuts—soak these in water first to make them more pliable and easier to install.
Fine-Tune the Position
Tighten hardware lightly at first to allow for minor adjustments. Once the bidet is properly aligned, fully tighten all connections. Ensure the mount is level, centered, and stable before attaching the bidet unit. Overtightening can crack porcelain, so tighten just enough to secure firml
Attach the Bidet Seat
Connect the bidet unit to the mounting system and secure it in place.
Install an Integrated Bidet Seat
Models like Brondell Eco Seat or ALPHA JX click into place easily. Align the rear tabs with the mounting bracket and slide the seat backward until you hear an audible click. Pull forward gently to test stability. Some models have a side release button for easy removal and cleaning.
Mount a Bidet Attachment
For add-on models like Brondell Easy Spa, place the unit on top of your existing seat. Align the holes and insert the bolts. Reuse the original hardware, making sure cone-shaped fasteners face upward. Tighten evenly to avoid warping or creating uneven pressure points.
Reinstall the Original Seat (If Needed)
For non-integrated models, place the original toilet seat over the bidet attachment. Reinsert the bolts and tighten both top and bottom. Ensure the seat moves freely and does not block any bidet functions.
Connect the Water Supply
Complete the plumbing by attaching hoses between the T-valve and the bidet unit.
Attach the Long Hose to the T-Valve
Connect one end of the long hose to the side outlet of the T-valve. Ensure a rubber gasket is seated inside the fitting. Hand-tighten first, then use pliers for a quarter turn extra.
Connect the Hose to the Bidet Inlet
Attach the other end to the inlet port on the bidet. Again, hand-tighten first, then secure slightly with a wrench. If any dripping occurs after turning the water back on, turn off the supply, reapply Teflon tape to the threads, and reseat the washer.
Plug In Electric Models
Power up advanced features safely and correctly.
Use Only GFCI Outlets
Plug electric bidets into a GFCI outlet to prevent shocks in wet bathroom environments. Keep the plug accessible for emergency disconnection or maintenance. Never hide the plug behind the toilet where you cannot reach it quickly.
Avoid Extension Cords
Extension cords pose fire hazards and violate safety codes. If no GFCI outlet is nearby, hire a licensed electrician to install one before using your electric bidet.
Test for Leaks and Restore Water
Turn the water back on and carefully check every connection.
Slowly Open the Shutoff Valve
Turn the valve counterclockwise slowly to allow pressure to build gradually. A sudden surge can loosen fittings that were not fully tightened.
Inspect All Joints
Check each connection point for drips or seepage. Use a dry paper towel to wipe connections and spot slow leaks that might not be visible immediately. Check the T-valve to shutoff connection, the T-valve to tank hose, the T-valve to bidet hose, and the hose to bidet inlet.
Fix Leaks Right Away
If you find leaks, shut off the water immediately. Retighten the connection slightly, reseat the washer, or reapply Teflon tape as needed. Retest after making corrections before considering the installation complete.
Test All Bidet Functions
Verify your bidet works as expected before finishing the project.
Activate and Initialize the Bidet
Press the power button or remote to turn on the bidet. Electric models may run a self-check or nozzle sanitization cycle automatically on startup.
Test Cleaning Features
Try the rear wash function for posterior cleaning, the front wash for feminine hygiene, oscillation mode if your model has it (nozzle moves back and forth), pulsation mode for massage effects, and the self-cleaning nozzle function that sprays before and after each use.
Test Comfort Features
Adjust water temperature through the heat settings, control water pressure from low to high, test seat heating if equipped, try the warm air dryer, activate the deodorizer to neutralize odors, and check the night light that illuminates the bowl in dark conditions.
Install With a Riser and Safety Rail
For users with mobility needs, special stacking procedures apply.
Stack Components in the Correct Order
Install the safety rail over the bolt holes first. Add the riser (without handrails) on top. Place the bidet on the riser, centering and leveling it carefully. Confirm the nozzle has clearance to extend and retract. Add the toilet seat on top and align all bolt holes precisely.
Secure Multiple Layers
Insert hardware through all layers and secure underneath with wing nuts. Apply self-adhesive rubber cleats to close front gaps and stabilize the entire setup. This prevents interference between handrails and bidet components while ensuring stable, safe use.
Avoid Common Installation Mistakes
These errors cause most bidet installation problems.
Always Use Teflon Tape
Skipping Teflon tape on threaded connections is the most common cause of leaks. Apply 4 to 5 turns clockwise on every threaded joint.
Never Overtighten Plastic Fittings
Hand-tighten plus a quarter turn with a wrench is sufficient. Overtightening cracks plastic fittings and creates more problems than it solves.
Always Use GFCI for Electric Models
Electric bidets must connect to GFCI outlets. This is not optional—it is required by electrical code and protects you from shock in wet conditions.
Always Test for Leaks Before Final Use
A small drip can lead to significant water damage over time. Test every connection thoroughly before considering the job complete.
Maintain Your Bidet Long-Term
Keep your bidet clean and functioning properly for years to come.
Clean the Exterior Weekly
Wipe the seat with a damp cloth and non-abrasive cleaner. Avoid harsh chemicals that damage plastic components or degrade seals.
Use Self-Clean Mode Regularly
Run the nozzle self-clean function after each use to spray water and flush debris from the nozzle housing. This maintains hygiene and prevents buildup.
Descale in Hard Water Areas
Every 6 to 12 months, run a vinegar or descaling solution through the system to prevent mineral buildup that can clog nozzles and reduce water pressure.
Replace Inline Filters
Change the water filter every 6 to 12 months depending on your water quality and how frequently you use the bidet. Clean filters extend nozzle life and maintain spray performance.
Final Verification Checklist
Before declaring the installation complete, confirm these items.
Water supply is fully restored with no leaks at any connection point. The toilet tank refills normally. The bidet seat is securely locked in place. All electrical components plug into a GFCI outlet. The remote or control panel powers on correctly. Rear and front wash functions operate as expected. Oscillation, pulsation, and spray adjustment work properly. Warm water, seat heating, and dryer functions (if equipped) operate correctly. The nozzle retracts automatically after use. Deodorizer and night light activate as expected. Protective stickers have been removed from the unit. Rubber cleats are applied if using a riser. Final stability and functionality tests are completed.
Key Takeaways for Installing Your Bidet
Installing a bidet toilet seat is a straightforward DIY project that typically takes 10 to 30 minutes with basic tools. The process follows a consistent sequence: shut off water, remove the old seat, install the T-valve with Teflon tape, mount the hardware correctly, connect water hoses, attach the bidet, test for leaks, and verify all functions work properly.
Success depends on using Teflon tape on all threaded connections, avoiding overtightening plastic fittings, ensuring proper nozzle clearance, using a GFCI outlet for electric models, and testing comprehensively before regular use. Most users report 70 to 90 percent reduction in toilet paper use and high satisfaction with their purchase.
Frequently Asked Questions About Installing a Bidet Toilet Seat
How long does it take to install a bidet toilet seat?
Most installations take 10 to 30 minutes depending on your experience level and whether you choose an integrated seat or attachment model. Simple cold-water bidet attachments can install in under 5 minutes.
Do I need an electrician to install an electric bidet?
You need a GFCI outlet, which is required by electrical code in bathrooms. If you do not have one nearby, hire a licensed electrician to install it. You can also choose a non-electric bidet to avoid electrical work entirely.
What tools do I need to install a bidet toilet seat?
You need a Phillips-head screwdriver, adjustable wrench or pliers, small bucket or towel, Teflon plumber’s tape, and bathroom cleaner with a cloth. All mounting hardware and hoses are typically included in the bidet kit.
Can I install a bidet on any toilet?
Most bidets fit standard round or elongated toilets. You must match the bidet shape to your toilet shape. Check that your toilet provides adequate nozzle clearance and that you have access to a compatible water supply and electrical outlet if needed.
Why is my bidet leaking after installation?
Leaks usually occur because Teflon tape was skipped, washers are not seated properly, or connections are not tight enough. Turn off the water, reapply Teflon tape to threaded joints, reseat all washers, and retighten connections.
How often should I clean my bidet?
Wipe the exterior weekly with a damp cloth. Use the self-cleaning nozzle function after each use. Descale the system every 6 to 12 months in hard water areas, and replace inline filters every 6 to 12 months depending on water quality.